



Observing the Sun
- 1. How the Sun Works: An Observer's Guide
- 2. Three Ways to Safely Observe the Sun
- 3. A Guide to White Light Solar Filters
- 4. Observing the Sun with White Light Solar Filters
- 5. A Guide to Hydrogen-Alpha Solar Filters and Telescopes
- 6. Observing the Sun in Hydrogen Alpha
- 7. Observing the Sun in Ca-K, Ca-H and Other Narrow Bandwidths
- 8. Accessories for Solar Observing
- 9. The Basics of Solar Imaging
1. How the Sun Works: An Observer's Guide
In this section on solar observing, you get a basic understanding of how the Sun works and which regions of the Sun you can see with solar filters most commonly available to amateur astronomers. You also discover the difference between narrowband and broadband (white light) solar filters and how they influence what you can see on and around the Sun.
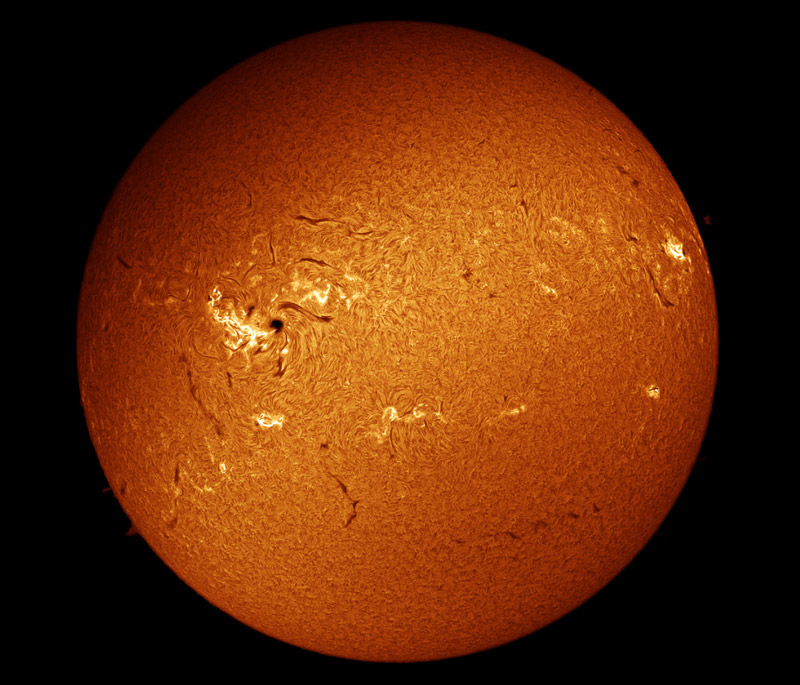
1.1 Why Observe the Sun
Most stargazers spend most of their time observing sights in the night sky. But the daytime sky offers an opportunity to examine—close up—the seething face of a major star, the Sun, the nearest star to Earth. As you are about to discover, when you become a regular observer of our home star, there's quite a bit for you to see. With the right equipment, many fascinating and beautiful features can be seen on the visible face of the Sun with a small telescope or binoculars, and you can enjoy special events such as total and partial solar eclipses and transits of planets and other objects across the face of the Sun.
Solar observing has many benefits for amateur astronomers. Unlike many faint objects in the night sky, the Sun is easy to locate and track during the day. There's no need to stay up late and lose sleep when observing the Sun. And with modern solar filters and accessories, it's possible to get amazing views of the Sun from your own backyard that were accessible only to professional astronomers twenty years ago.
1.2 How the Sun Works: An Overview
The Sun is a star, the nearest star to Earth. Like all stars, it's a massive sphere of mostly hydrogen and helium gas and a brew of ionized hydrogen in the form of protons and electrons which together are called a plasma. The Sun is held together by its own gravity, and the mass of its outer layers pushes down on the interior region and core, heating it and igniting nuclear reactions that convert hydrogen into helium and causing the release of huge amount of energy. This energy pushes back against the internal gravitation of the Sun and prevents it from collapsing further.
The Sun has no solid "surface" like the Earth and other rocky planets in the solar system. The gas and plasma that makes up the Sun simply gets denser and hotter from the outer regions towards the center. The light generated in the core of the Sun is scattered in many directions by the dense soup of plasma within the vast majority of the Sun's volume, so we can't see very far into the Sun. Only in the very outer layers, when the gas becomes cool enough for some of the electrons to reunite with the atoms of hydrogen and helium, is the light free to flow outwards from the Sun and into your telescope.
Although astronomers can't see inside the Sun, they can determine, through observation and calculation, distinct sections in the Sun based on the temperature, pressure. Energy is transferred through these sections from the hot core, where it is created, to the cooler outer layers that we can see. Let's have a look at the main parts of the Sun.
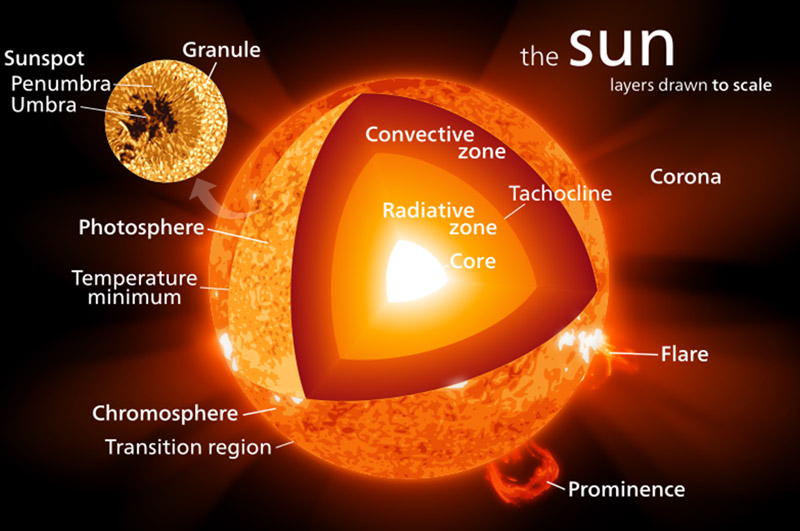
1.3 The Insides of the Sun
The Core. The core of the Sun is where hydrogen turns into helium through the process of nuclear fusion. Every second, the Sun turns about 600 billion kg of hydrogen into helium in the core. That's the energy equivalent of about 100 billion megatons of TNT. The core accounts for about 20% of the solar radius and 99% of the energy production in the Sun. Its temperature is about 15 million K and its density is some 150 g/cm3. The density of lead, by comparison is about 11.3 g/cm3.
Most of the energy is released as tiny particles called neutrinos and as an energetic form of light called gamma rays. The neutrinos, which interact very weakly with matter, emerge from the core and out into space in a matter of seconds. The gamma rays take much longer to escape from the dense solar interior. They tend to scatter about for 100,000 years or so, losing energy all the while, before they finally emerge from the Sun as visible light. So the sunlight falling on your garden flowers was produced in the center of the Sun about 100,000 years ago, on average.
Radiative Zone. Above the core lies a zone where very little nuclear fusion occurs. Here, the atoms of hydrogen and helium are still ripped apart from their electrons because of the intense heat of some 2 million to 7 million K. Energy escapes outward here from the hotter lower layers to the cooler outer regions by thermal radiation, the same effect that causes your hand to lose heat example, near a cold window. The radiative zone extends from about 20% to about 70% of the solar radius.
The Convective Zone. Moving out from the radiative zone, it becomes cool enough for some atoms to recombine with their electrons. This results in the formation of cells of convection, where hot gas rises in convective cells or bubbles, a little like bubbles in a pot of boiling soup. As hot gas rises, it releases heat and light to the outer layers of the Sun, cools and becomes denser, and falls back down to the lower layers of the convective zone.
The sharp division between the radiative and convective zones is called the tachocline. It lies about 200,000 km below the Sun's visible surface. The convective zone takes up most of the rest of the solar radius. You can glimpse the top layers of these deep convective zones in the Sun's photosphere. They look like circular granules on the visible surface of the Sun.
1.4 The Visible Parts of the Sun
The Photosphere. Moving further out from the convective zone, the plasma cools and the hydrogen and helium gas become mostly neutral atoms again. The light moving upward is no longer scattered around in all directions and visible light of all wavelengths escapes freely into space. The thin layer at which this happens is called the photosphere. The bright white light we can see with our eyes and telescopes comes primarily through the photosphere—Greek for the "sphere of light". It's just a few hundred kilometers thick and is about as transparent to light as Earth's atmosphere. At the photosphere, the Sun's gas has cooled to a temperature of about 5,700 K, and the light we see is similar to that coming from a solid glowing body of that temperature. The density of the photosphere is less than 1% that of Earth's atmosphere.
The magnetic fields within the Sun and the underlying convection zones result in many interesting features within the Sun's photosphere that are visible with small telescope and an appropriate solar filter. These features include:
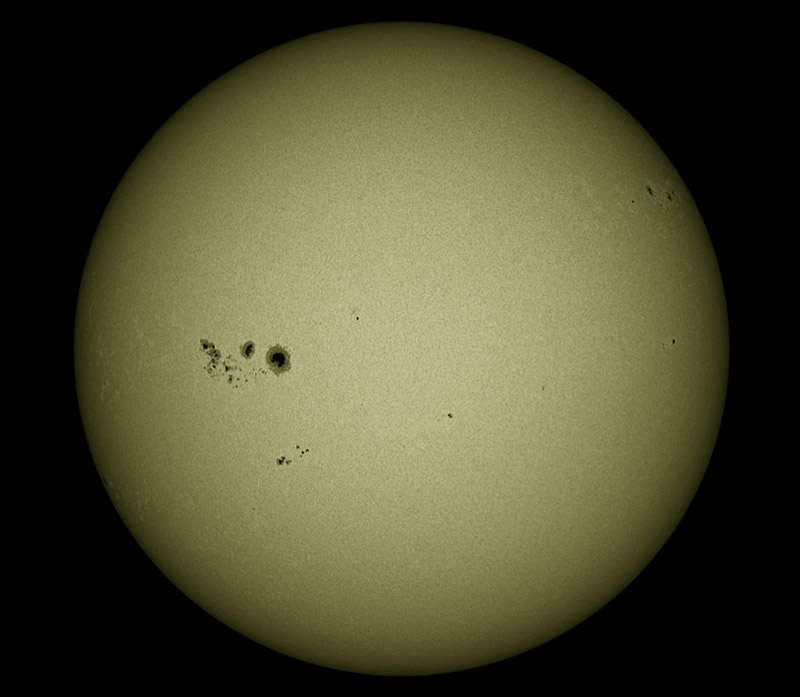
- Sunspots. Large dark spots caused by strong magnetic fields inside the Sun that reach the photosphere, sunspots are dark patches several thousand kilometers across that last for one to two weeks. They are among the easiest features to observe.
- Granules. The hot gas in the Sun's photosphere rises and falls in large bubbles or cells about a thousand kilometers across. Because these cells look like little grains across the visible surface of the Sun, they are called solar granules.
- Pores. Small dark features that appear to be the beginnings of new sunspots.
- Faculae. Hotter, brighter patches in the photosphere which, like sunspots, are also caused by magnetic fields.
- Limb Darkening. An effect in the photosphere where the extreme edge of the solar disk appears darker than the center.
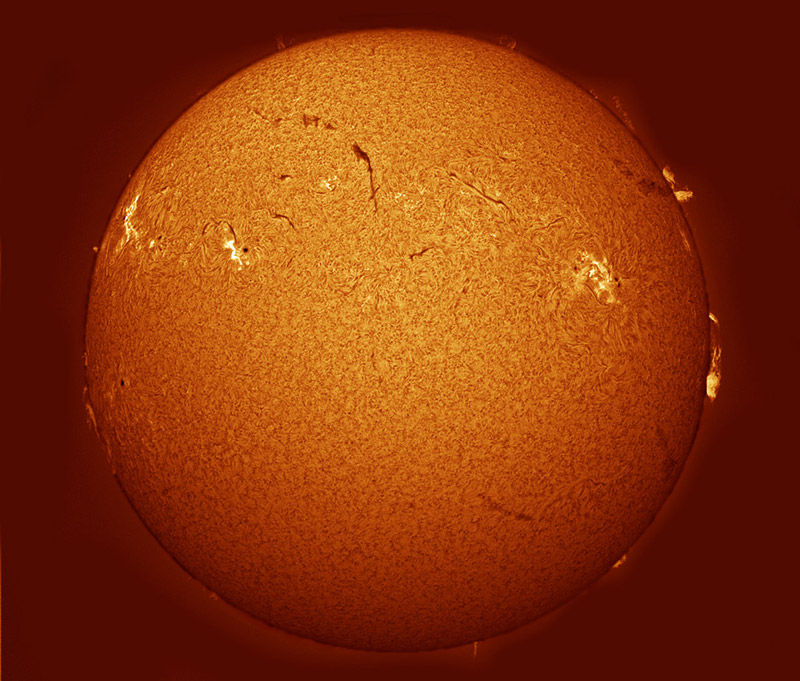
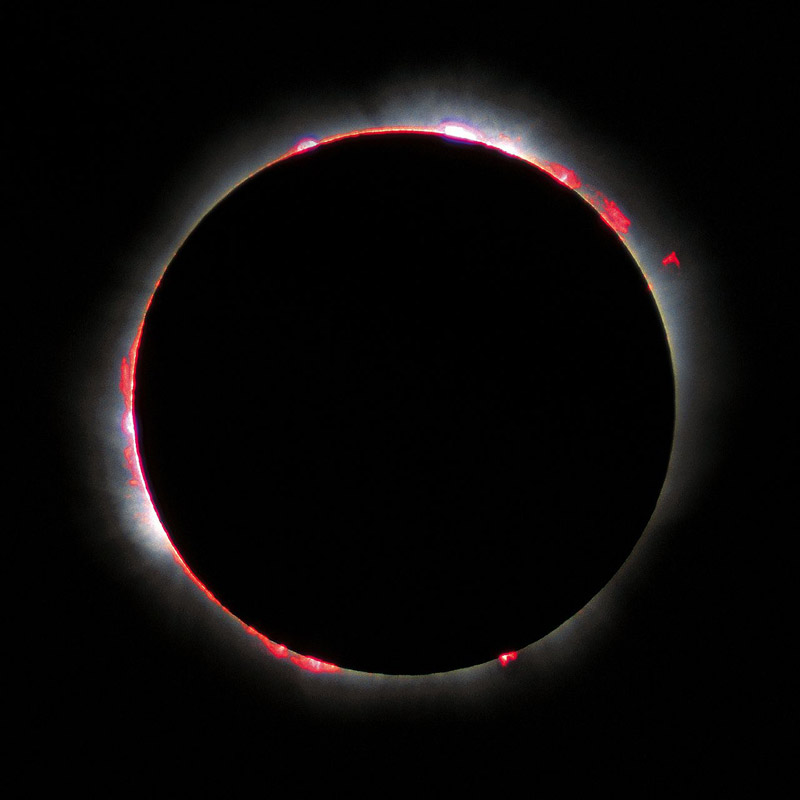
The Chromosphere. Just above the photosphere lies an even more rarified region called the chromosphere, a region so-named because of its colorful appearance. The light from the chromosphere comes mostly from hydrogen atoms excited into higher energy levels. These excited hydrogen atoms emit light at specific wavelengths, particularly a wavelength 656.3 nm, the so-called "hydrogen alpha" wavelength, that corresponds to red-orange light. The chromosphere can be spotted as a reddish ring when the Moon completely covers the face of the Sun during a total solar eclipse.
The bright white light from the Sun's photosphere can overwhelm the fascinating and dynamic features in the chromosphere. However, by using a filter that passes only light at 656.3 nm and blocks all other wavelengths of visible light, you can get a detailed view of the chromosphere. With such a filter and with a small telescope, many features in an around the chromosphere become visible including:
- Prominences and Filaments. Immense loops of hot gas suspended over the chromosphere by magnetic fields, they are perhaps the most dramatic features visible in a small telescope with an H-alpha filter.
- Plages. Bright patches associated with sunspots but well above them in the chromosphere.
- Flares. Gigantic and extremely bright ejections of material from the Sun with the energy of millions of hydrogen bombs.
- Chromospheric Network. A subtle weblike structure in the chromosphere.
- Spicules. Small short-lived jets of material that move directly upward from the Sun's surface.
All of these features, those visible in white light and in hydrogen-alpha, will be described in more detail in the next articles in this series.
The Corona. The temperature drops as you move from the Sun's core to the chromosphere. But it the upper layers of the chromosphere, the temperature begins to increase again. No one knows why. It may be a result of magnetic effects. Above the chromosphere lies the Sun's ethereal corona, a tenuous vapor of plasma that extends millions of kilometers into space and has an effective temperature of 1 million K, nearly 200 times the temperature of the photosphere. The chromosphere can only be seen directly as a ghostly-white glow during a total solar eclipse.
1.5 White-Light vs. Narrowband Solar Filters
Now that you have an understanding the workings of the Sun and its visible layers, the photosphere and the chromosphere, you're equipped to understand the two main types of solar filters available to amateur astronomers.
The most prominent visible layer of the Sun, the photosphere, emits brilliant light at all visible wavelengths, as well as the infrared and ultraviolet. So to safely observe the photosphere, with or without a telescope, you need a broadband or white-light solar filter that reduces the intensity of all colors of light entering your eye to a safe level suitable for visual observation or imaging. These filters, which reduce the brightness of light by 99.999%, are available for most types of telescopes, binoculars, and even camera lenses. Many white-light solar filters typically look like mirrors because they reflect most of the visible light that falls on them.
With a white-light solar filter, you can see features in the Sun's photosphere. Such features, as mentioned above, include sunspots, faculae, solar granules, and limb darkening. Later articles in this series will discuss white-light solar filters and what to see with them in greater detail.
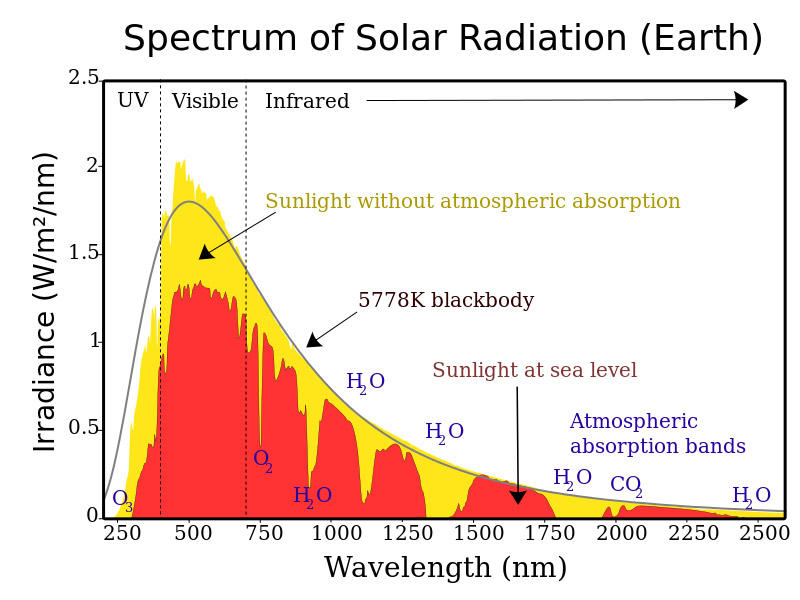
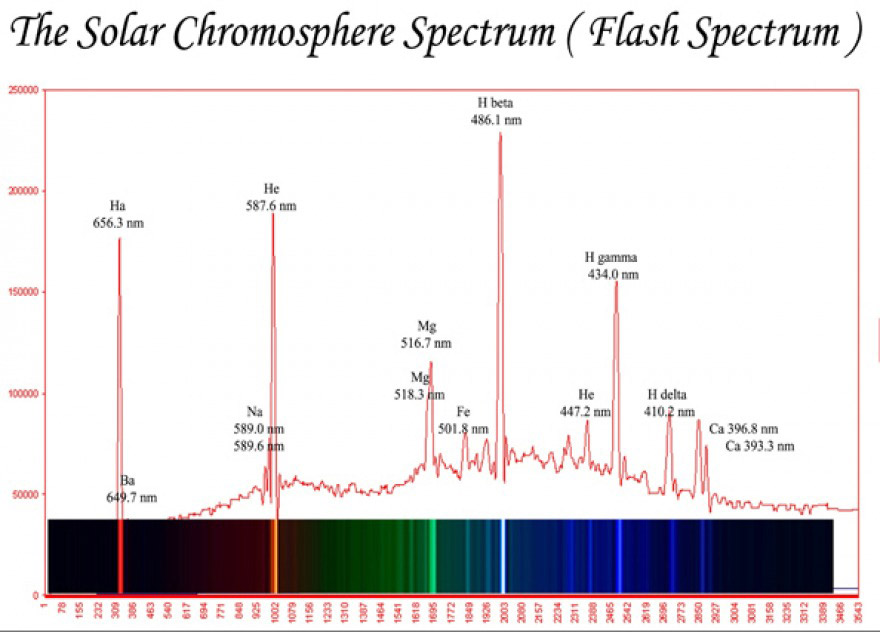
Light from the Sun's chromosphere comes from atoms that emit light not over a broad spectrum but at discrete wavelengths. To see light from the chromosphere, you need a filter that passes light from hydrogen and other atoms and blocks the white light from the much brighter photosphere. That's the purpose of narrowband solar filters.
The most common type of narrowband filter, a hydrogen alpha solar filter, passes light around a very narrow band near 656.3 nm. Because hydrogen-alpha solar filters block the much brighter white light from the photosphere, they allow the direct observation of events and features on the Sun that are not visible with white-light solar filters, especially the dramatic solar prominences and filaments that loop and arc thousands of miles above the Sun's visible surface. You will learn more about narrowband filters and solar features in subsequent articles in this series on observing the Sun.
SAFTEY NOTE: Many types of astronomical objects, especially reddish-pink nebulae like Orion Nebula and the North America Nebula, also emit light at the H-alpha wavelength of 656.3 nm. Many astronomical filters for visual observation and imaging of these faint nebulae are designed to pass light in a band 5 nm to 10 nm on either side of the main H-alpha wavelength. These filters have a much wider band than hydrogen-alpha solar filters and they are UNSUITABLE and UNSAFE for solar observation.
2. Three Ways to Safely Observe the Sun
In the first section of this article on solar observing, you learned the basics of how the Sun works along with an overview of what you can see on the visible face of the Sun. You also discovered the difference between narrowband (such as H-alpha) and broadband (or white light) solar filters and how they influence what you can see on and around the Sun. In this article, you get down to business by learning the three main approaches to visual solar observation: filtered naked-eyed observation, solar image projection with a telescope or binoculars, and filtered observation with white-light or narrowband solar filters with a telescope or binoculars. Each method differs by cost of equipment and by access to detail on the visible face of the Sun. But all three techniques belong in the toolkit of every amateur solar astronomer.
2.1 Important Safety Tips for Solar Observation
First, an important word about safety. Solar observing is the most potentially hazardous activity for amateur astronomers in an otherwise fairly safe pastime. Looking at the Sun just with your naked eye is dangerous enough. But looking at the Sun through a telescope or binoculars without a proper solar filter is a sure way of going blind in less time than it takes to blink. Equipment manufacturers and astronomers have developed a number of filter technologies that allow safe solar viewing. To make sure you don't make a dangerous mistake when trying to observe the Sun, here are some things you should NEVER do:
- Never look at the Sun directly with your eyes without a safe solar filter, even with your unaided eye, even through thick haze, for any length of time.
- Never look at the Sun through a telescope, even your finder scope, without a proper filter. Although you may at first feel no pain when you look at the unfiltered Sun because your retina has no nerve endings, you will be permanently blinded almost instantly if you look at the Sun through any size telescope.
- Never leave a telescope unattended outside in the daylight, especially around children, unless caps or solar filters are securely placed over the main objective and the finder objective. At the sight of a telescope, the curious and uninformed just might try a little solar observing, either accidentally or deliberately. You should treat a telescope in daylight like a loaded gun.
- Never use a solar filter designed to thread into the eyepiece of an otherwise unfiltered telescope. These filters are often supplied with cheap "department store" telescopes. All the light from the Sun is focused through the telescope onto these little filters which eventually crack or melt and allow concentrated sunlight to suddenly hit your eye. A proper solar filter removes most of the light and heat from the Sun before it enters the telescope at the objective lens or mirror. This video shows how quickly these filters can crack.
- Never use as a solar filter smoked glass, sunglasses, layers of photographic film, photographic filters, sheets of Mylar from a camping blanket, Pop-Tart wrappers, or the bottom of a beer bottle to observe the Sun. None of these will protect you sufficiently.
2.2 Solar Observing Without a Telescope
Using safe but inexpensive white-light solar filters in front of your eyes, you can simply look towards the Sun and see the Sun's photosphere, the outer layer of the solar atmosphere from which light escapes into space. Such filters come in the form of mounted sheets of specialized dark plastic in the form of solar viewing cards or "eclipse glasses". Even small sheets of sufficiently dense #14 welder's glass work well. These filters cost as little as a few dollars yet they reduce the dangerous light and heat from the Sun to a safe level.
SAFETY NOTE: Do NOT use eclipse glasses, solar viewing cards, or #14 welding glass to view the Sun through an otherwise unfiltered telescope. These devices are intended for use with the naked eye only. The concentrated image of the Sun can quickly damage these devices and result in permanent eye damage.
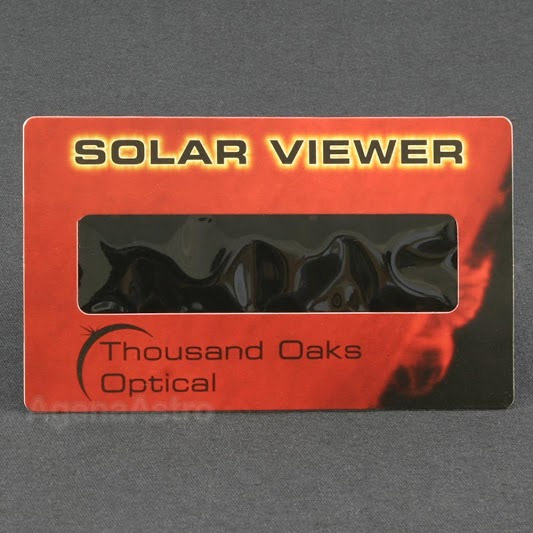
With only these simple and low-cost white light filters, the Sun's disk and large sunspot groups can easily be resolved. During a solar eclipse, the disk of the Moon as it slowly passes across the Sun becomes visible with these filters, as does the disk of Venus when it passes across the face of the Sun, an event known as a transit. Smaller sunspot groups, solar granulation, faculae, the disk of Mercury as it transits the Sun, and other small features cannot be resolved. Features such as solar prominences, no matter how large, are not visible with simple eclipse glasses and solar cards, or with any white-light filters. They are visible only with narrowband H-alpha filters and a telescope.
2.3 Projecting the Sun's Image
Projecting the image of the Sun from a telescope is another straightforward and inexpensive method to observe the Sun in white light. The projection method dates back nearly to the invention of the telescope itself. In its simplest form, the technique simply involves holding a thick piece of paper or cardboard a foot or two behind the eyepiece of the telescope when the scope is aimed at the Sun and brought to focus. The image from the eyepiece projects onto the paper screen. The greater the distance from the eyepiece to the screen, the larger the image. That's all there is to it.
To get a projected view on the screen with good contrast, place a small diaphragm made of cardboard over the top or bottom of the telescope tube to block unwanted sunlight from falling onto the screen. No other special equipment is required for this method, though some vendors sell a white screen and a mechanical holder that fixes on the back of the telescope or focuser to hold the screen in place.
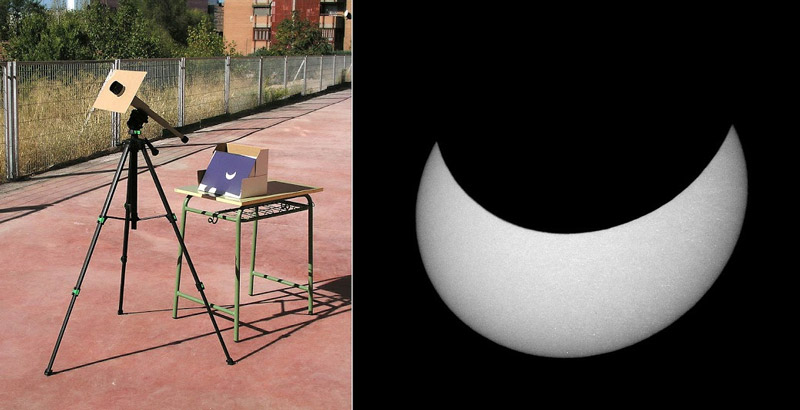
You can also use a pair of binoculars mounted on a tripod-- with a cap placed over one of the two objective lenses-- to project the image of the Sun onto a screen. However, with binoculars, it's best to observe the Sun for only a few minutes at a time because the Sun's heat can damage the adhesive used to hold in place the glass prisms inside the sealed optical tube of the binoculars. With magnification of 7x to 10x, binoculars show much more on the Sun's disk than the unaided eye, but they are still limited compared to a telescope in terms of how much they can enlarge solar features such as sunspots, plages, and faculae.
SAFETY NOTE: When using the projection technique with telescopes or binoculars, remember the full intensity of the Sun is coming out of the eyepiece. So make sure no one, especially a small child, walks up and looks through it. For the same reason, it's also good practice to cover the finder scope of a telescope during a solar observing session.
The simple projection method works well for obtaining low-magnification and full-disk views of the Sun, larger sunspot groups, light-colored faculae, and for watching sunspots move across the face of the Sun each day during the Sun's 26-day rotation period. The method is also well suited for showing the Sun's disk to larger groups of observers, especially during partial solar eclipses.
Because the telescope is unfiltered when using the projection method and the Sun's full intensity falls into the optics, this method is best suited for small refractors or Newtonian reflectors of less than 3" to 4" aperture. Larger telescopes collect too much light and heat which may result in damage to the eyepiece. The projection method should be avoided with Schmidt-Cassegrain and Maksutov-Cassegrain telescopes. These instruments, which almost always have apertures larger than 4", will suffer heat build-up inside their sealed tubes leading to degraded views and perhaps permanent damage of the instrument.
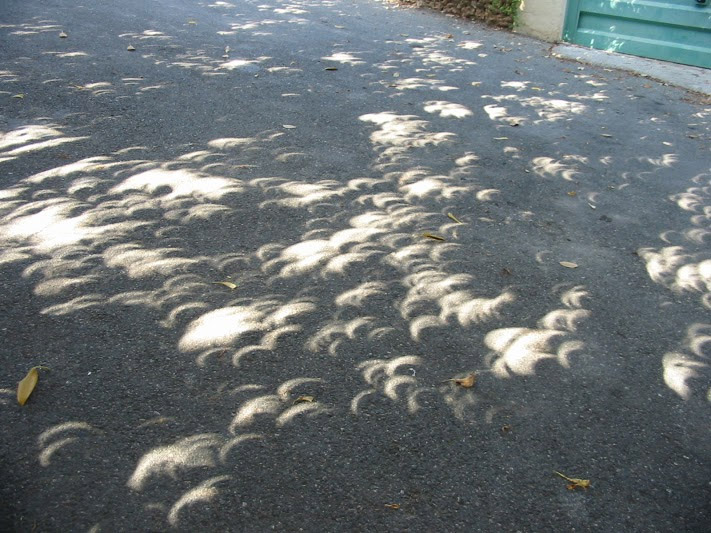
The projection method also points the way to the simplest technique of all to observe the Sun: a pinhole camera. Just poke a tiny hole in a piece of cardboard or a thick piece of paper, aim the card at the Sun, and project the image onto a second piece of paper at least a foot away. This approach yields a small and faint image of the Sun, but it can reveal larger sunspot groups and the progress of a partial solar eclipse. Sometimes, during a partial eclipse, you can see multiple images of the eclipsed Sun cast onto the ground by the pinhole gaps between leaves on a tree.
2.4 Using Solar Filters with a Telescope – An Overview
You get the best views of the Sun using a solar filter mounted over the objective lens or mirror of an astronomical telescope. A solar filter reduces the brilliant light and heat from the Sun before entering the telescope and allows you to get safe, high-magnification views of the Sun's disk using the same eyepieces and accessories you use for observing objects in the night sky. A solar filter is not usually included as a standard accessory with a telescope.
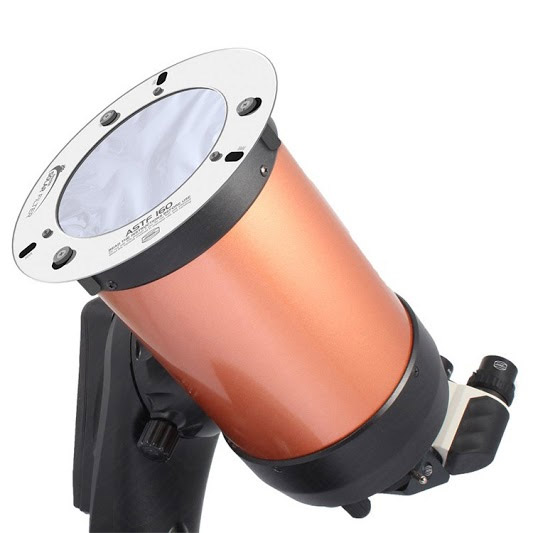
As mentioned in the first article in this series, there are two main types of solar filter: broadband or white-light filters and narrowband filters such as H-alpha. Broadband or white-light filters are the simplest and least expensive type of solar filter. They are made from reflective glass or sheets of Mylar or a more specialized optical film and mounted in a cell that fits over the objective of a telescope. They reduce the intensity of the Sun's heat and light by a factor of 100,000 or more. Once the solar filter is mounted on the telescope, an observer selects a standard astronomical eyepiece to get the best magnification to see sunspots, granulation, faculae, and other features in the Sun's photosphere.
White-light solar filters are available for most astronomical telescopes. Including a mounting cell, such filters cost $30-$200 depending on their size and configuration. You will learn more about white-light solar filters in the next article in this series.
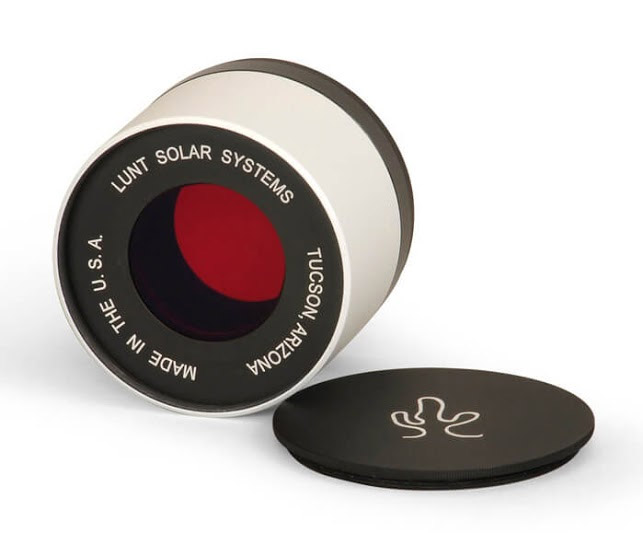
The most striking views and images of the Sun are obtained with H-alpha and other narrowband solar filters. An H-alpha filter, the most commonly used narrowband filter by amateur astronomers, gives a view of hydrogen atoms in the chromosphere, a region of the Sun's atmosphere above the much brighter photosphere. These filters enable views of solar features that are not visible with broadband solar filters including solar prominences and filaments, which are large arcs of hydrogen gas suspended in magnetic fields above the limb of the Sun, bright plages above sunspots, and Ellerman bombs, fleeting events associated with solar magnetic fields breaking through into the photosphere and chromosphere.
H-alpha filters are available as accessories for some types of astronomical telescopes, usually small refractors. A temperature-compensated mechanical cell holds the filter element and mounts on the telescope tube. The mounting cell may also include a manual control mechanism to tune slightly the center of the passband of the filter above and below the nominal H-alpha wavelength of 656.3 nm. Tuning results in better contrast of many features in the Sun's chromosphere.
All H-alpha solar filters must be paired with a solar diagonal in place of a star diagonal. The solar diagonal further reduces unwanted light and heat from the optical path before the Sun's image reaches the eyepiece. The downside of H-alpha and other narrowband solar filters? The cost. Such filters along with their mounting cells and solar diagonals cost $1,000-$3,000 or more depending on the aperture and passband. Narrower passbands give more striking views, but they cost much more.
A later article in this series gives more information and suggestions on selecting and using H-alpha and other narrowband filters for solar observation.
2.5 Telescope Aperture and Solar Observing
Which telescope works best for solar observing? When observing faint objects in the night sky, of course, a larger-aperture telescope is usually better. Bigger lenses and mirrors collect more light and make for brighter images, and they give greater resolution to bring out finer detail in planets, the Moon, and deep-sky objects. When observing the Sun, image brightness is not a problem, of course, so a larger telescope is not a necessity to see many solar features. Larger aperture does improve resolution of fine detail on the Sun, but it comes with the need for a larger solar filter, and larger filters are more expensive. Larger telescope tubes also suffer more from the effects of thermal air currents within the tube and from the degrading effects of atmospheric turbulence. The Earth's atmosphere is particularly unstable during the day. While white-light filters, in particular, are available for most telescopes, experienced solar observers suggest the trade off between resolution, air currents, atmospheric seeing, and cost favors the use of telescopes with an aperture of less than 6" (150mm).
3. A Guide to White Light Solar Filters
In this third section, you get an in-depth look at white light solar filters that let you safely observe the brilliant broadband light coming from the Sun's photosphere, the thin outer layer of the Sun where light emerges from the denser, hotter layers below. You will also learn about an alternative to a front-mounted solar filter—the so-called Herschel wedge or solar wedge—that removes light after the objective lens but before the eyepiece of a small refractor telescope.
3.1 Front-Mounted White-Light Solar Filters for Telescopes
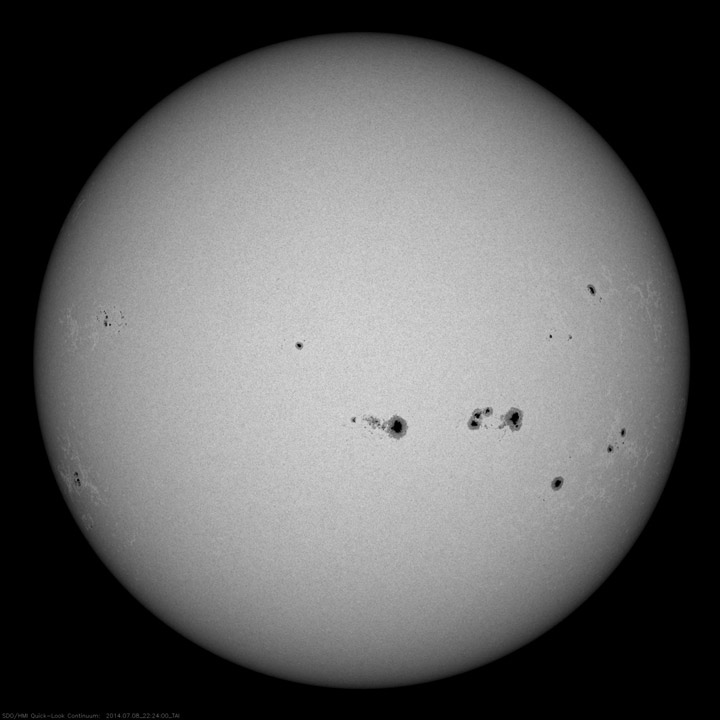
As explained in the previous section in this series, observing the Sun with just your eyes and safe eclipse glasses or #14 welder's glass is good enough for seeing large sunspot groups or solar eclipses. But if you want to see the fascinating features on in the Sun's photosphere like sunspots or granulation or solar flares, you will need the resolution and magnification of a telescope. The most economical way to view the Sun directly with a telescope involves mounting a white-light filter in front of the objective lens or mirror to reduce the intensity of the visible, infrared, and ultraviolet light entering your telescope to a level of intensity that's safe for your eyes and your telescope. White-light solar filters are usually mounted in mechanical cells or holders that fit over the objectives of most types of telescopes, including refractors, Newtonian reflectors, and Schmidt-Cassegrain and Maksutov-Cassegrain reflectors with a wide range of apertures, from 2" to 14" or more.
White-light solar filters come in three main varieties: glass filters, mylar filters, and the specialized AstroSolar film manufactured by Baader. These filters, once safely mounted, are all you need to safely observe the Sun with a telescope. You can use your regular eyepieces with your telescope to observe the Sun with these front-mounted solar filters. No other accessories are required.
3.1.1 Glass Solar Filters
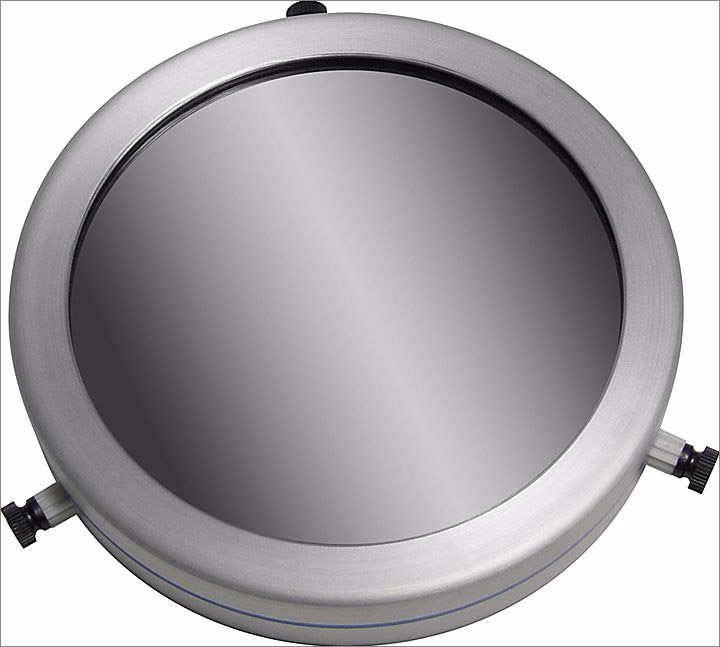
Glass solar filters are a great choice for budget solar observing with a telescope. These filters use flat polished glass coated with nickel and chromium to attenuate the Sun to 1/1000 of 1% of full intensity. Glass filters give the Sun's image a pleasing orange-yellow tint. Thousand Oaks and Orion are the main manufacturers of glass solar filters. The cost is roughly $65 for a mounted filter for a small refractor to $200 for a mounted filter for a 14" Schmidt-Cassegrain telescope. Glass solar filters give good white-light views of the Sun at low to moderate magnification.
3.1.2 Mylar Solar Filters
Mylar solar filters can be even more economical than glass filters. They give the Sun an odd blue tint, which some observers don't like, but this tint can be removed by using a #23A red color filter at the eyepiece. Mylar solar filters are specifically designed for solar observing. They are not the same as low-grade Mylar sheets used for thermal blankets and packaging, which are NOT recommended for solar observing or for do-it-yourself solar filters.
3.1.3 Baader AstroSolar Filters
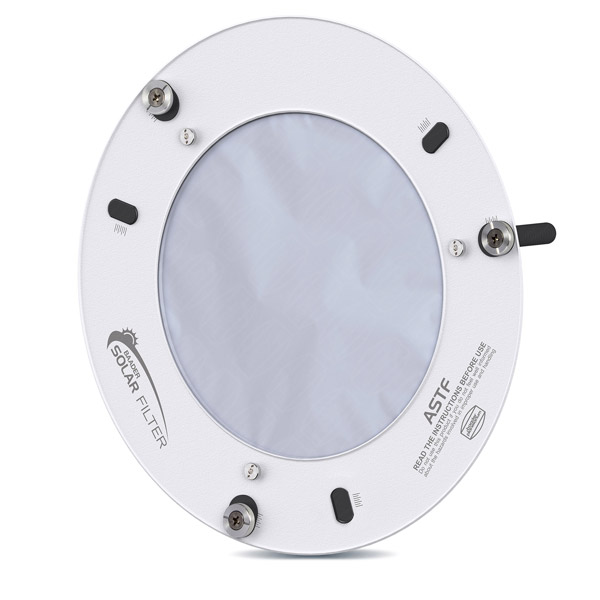
The company Baader Planetarium has moved beyond Mylar and designed a specialty AstroSolar safety film. It’s a high-strength polymer that’s metalized on both sides. Solar filters made with this material are durable and they give you a natural white image of the Sun. They also result in very good white-light solar images at high magnification. The filters are mounted in mechanical cells without added stress to help maintain high-image quality over a wide range of operating temperature. Don’t be surprised to see wrinkles in these thin-film filters when they are mounted in a cell. The wrinkling does not affect image quality.
These front-mounted Baader filters can fit a wide range of telescope apertures, and they are also available for binoculars, spotting scopes, and camera lenses as well. Agena also sells a few ready to use solar filters made from Baader Astro Solar Film.
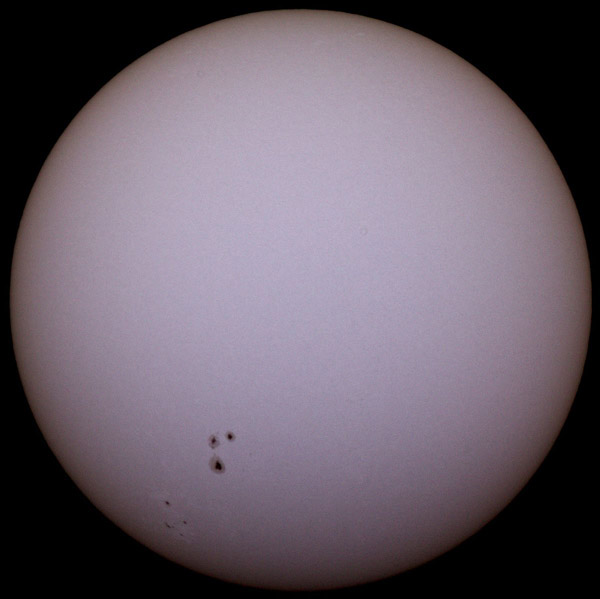
You can also buy sheets of AstroSolar film separately and make your own inexpensive mounting cell out of cardboard. You can learn more about making your own solar filter out of AstroSolar film at this link: http://astrosolar.com/en/information/how-to/how-to-make-an-inexpensive-filter-cell
3.2 Tips For Using White-Light Solar Filters
With an objective-mounted filter, whether glass, Mylar, or AstroSolar film, get a full-aperture filter if your telescope's objective is less than 5-8 inches or so. The larger aperture will, in most cases help improve the resolution of the Sun's image.
However, with telescopes of aperture of 8 to 10 inches or more, a full aperture solar filter is not as critical. While you can still get a full-aperture filter for larger scopes, the image you obtain is often limited by seeing conditions during the day, which are usually less than ideal, and by currents in the telescope tube. So a larger telescope is often outfitted with an "off-axis" filter that has an off-center filtered aperture that's smaller than the full size of your telescope's objective. The remainder of the full aperture blocks the bright light with thick plastic. Because less filter material is uses, this approach keeps down the cost of the device.
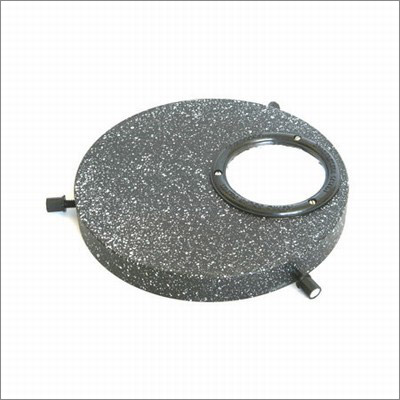
A few more safety tips for observing with white-light solar filters…
- Make sure you double check to make sure the filter and its mounting cell are securely fixed to the front of your telescope tube before you aim at the Sun. Make sure you get a filter that fits the tube of your scope or binoculars. One size does not fit all. Most vendors have the filters mounted in cells to match the most common apertures of telescopes available on the market.
- Cover the objective of your finder scope… and NEVER use the finder to find the Sun. Instead, aim your telescope in the general direction of the Sun and adjust its position to minimize the size of the shadow its tube casts on the ground. When the telescope is aimed at the Sun, its tube will cast a small circular shadow on the ground. Then—with the solar filter firmly in place over the telescope tube-- use your lowest power eyepiece to get the Sun into the field of view. Once you are lined up, you can move to higher power when you're ready.
3.3 Solar Wedges
Solar filters made of mounted glass, Mylar, and AstroSolar film are all examples of front-mounted solar filters than block 99.999% of the Sun's light from entering a telescope tube. They have the advantage of keeping the optics of the telescope cool, which can help with obtaining steady images, and they can be used with reflectors, compound telescopes, and refractors. However, front-mounted filters, especially glass and Mylar filters, can slightly reduce the contrast and sharpness of the solar image.
Solar wedges offer another solution for safely reducing the amount of sunlight reaching an observer's eye. These optical elements are "rear mounted" on the telescope after the objective but before the eyepiece, and they are usually mounted in a diagonal housing placed in the telescope's focuser. Solar wedges were first used in the mid-19th century, most notably by Sir John Herschel, so they are sometimes called a Herschel Wedge. If designed with high-quality optical elements, solar wedges can give excellent views and photographic images of the Sun in white light, even at high magnification.
When using a solar wedge, the full intensity of the Sun's light enters the telescope. This can be a dangerous proposition for telescopes larger than 3" or 4" aperture because the optics, especially the secondary mirrors of reflectors, can heat up and possibly suffer damage. For this reason, solar wedges are generally recommended for use only with refracting telescopes of aperture 6" or less. No additional optical elements, such as a color filter, should be inserted into the optical path before the solar wedge because of the risk of heat damage from direct sunlight captured by the telescope objective. The image below shows the optical layout of a solar wedge.
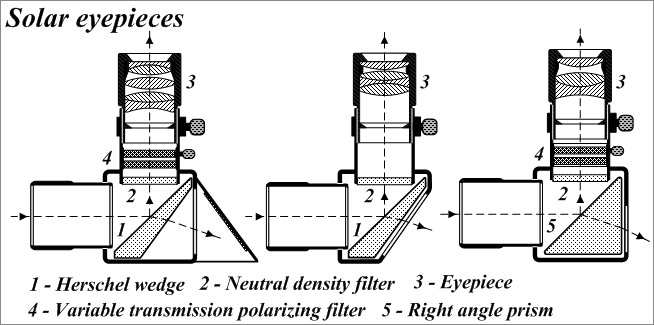
A solar wedge consists of optically-flat but uncoated glass that reflects only a small amount, about 4.5%, of the Sun's light towards the eyepiece. The rest of the light is "dumped" into a darkened absorbent material, cavity, or screen within the housing of the wedge. The light that travels onwards towards the eyepiece is still far too bright to view safely. So an additional glass filter—a neutral density filter—is used to further attenuate the Sun's white light by a factor of 1,000 or more. Further attenuation by a variable polarizing filter is often recommended to reduce the Sun's intensity to a comfortable level.
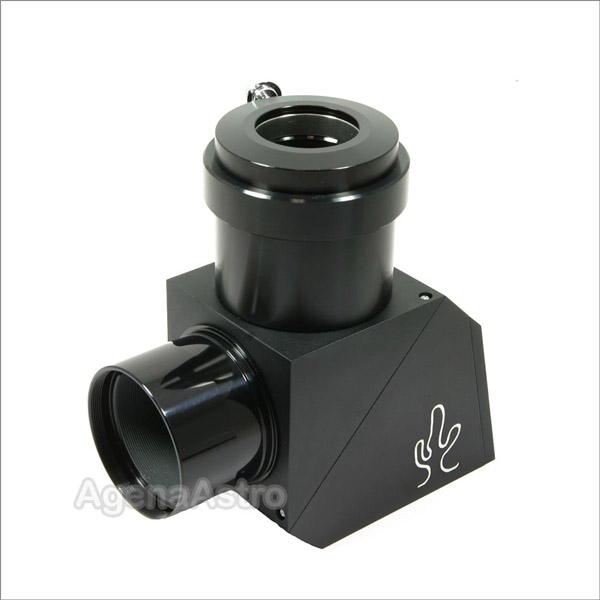
Lunt Solar Engineering offers a 1.25" solar wedge for refractor telescopes up to 4" aperture and a 2" solar wedge for apertures up to 6" aperture, both for visual observing or imaging. Baader also offers two premium devices for photographic and visual use. The Baader devices include a small screen on the housing that can be used to safely find the solar image.
4. Observing the Sun with White Light Solar Filters
In this fourth section on how to safely observe the Sun, you get an overview of what to see in the Sun's photosphere, the thin and rarefied outer layer from which light and heat in the interior of the Sun finally escape into space. Although the photosphere is only 100-200 km thick, a tiny fraction of the Sun's 700,000 km radius, all the features you see on the Sun with a telescope equipped with a white light filter lie within the photosphere.
4.1 Sunspots
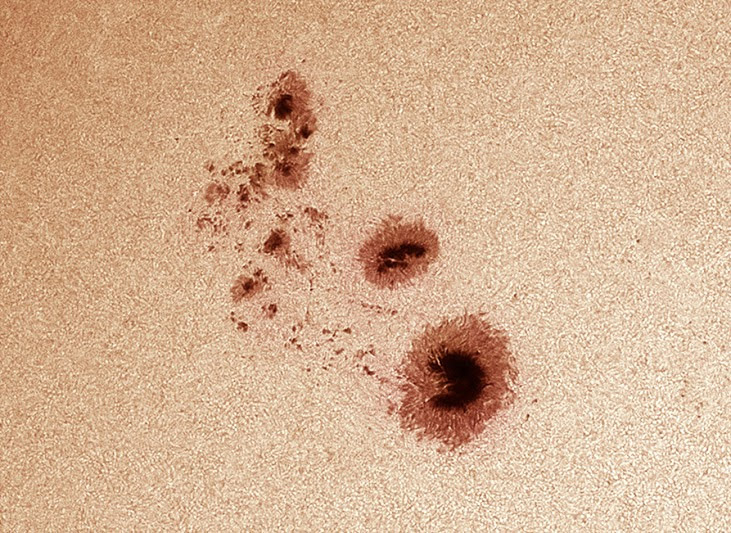
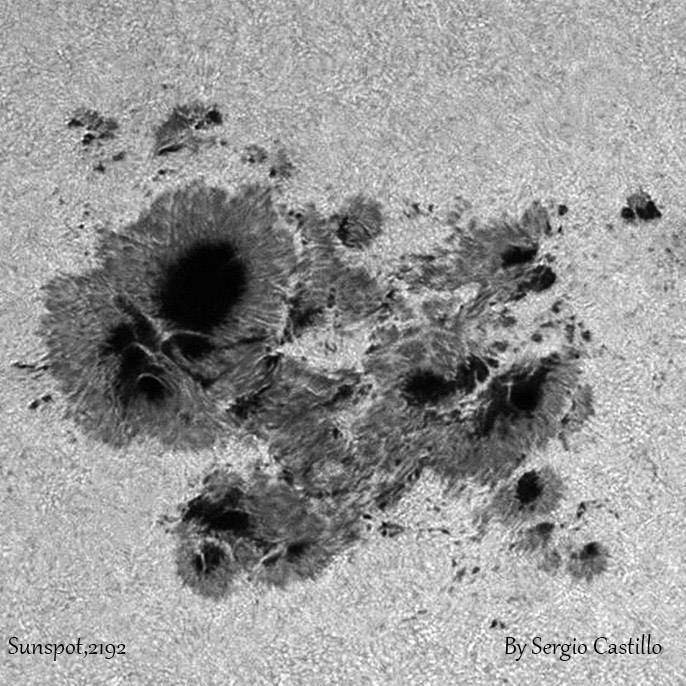
Sunspots are perhaps the easiest and most interesting features of the photosphere to see with a small telescope and a white-light solar filter. Sunspots, which appear as small dark features, are like the hurricanes of the photosphere. They are large storms, not of rain and wind, but of intense magnetic activity caused by twisting tubes of magnetic flux deep within the Sun. These tubes wind through the innards of the sun and pop out into the surface from time to time. Because they're magnetic in nature, sunspots always occur in pairs with opposite magnetic polarity, just like magnets here on Earth.
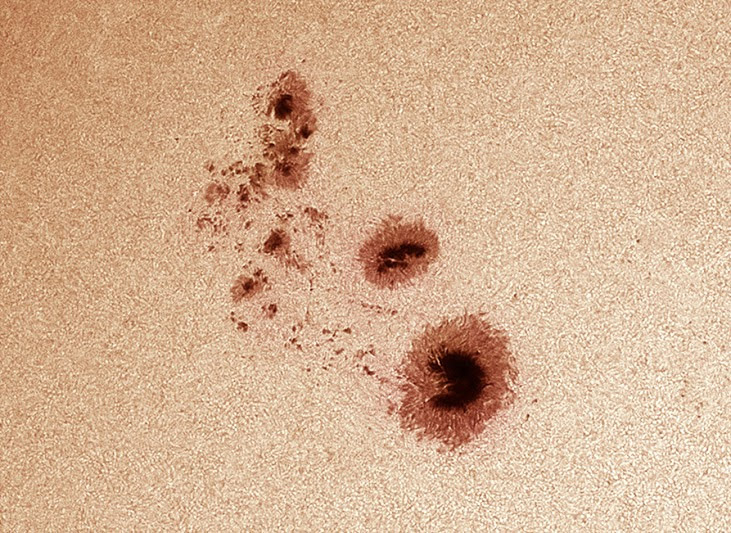
When a magnetic tube pops through the surface, it interrupts heat flow from below and drops the local temperature to about 4,500 K, cooler than the 5,700 K temperature of the surrounding photosphere. That's what makes a sunspot dark: it's still hot, but it's cooler than the rest of the photosphere. It still emits light, just not as much as its surroundings. The coolest and darkest area of a sunspot is the umbra; the slightly hotter and brighter area surrounding the umbra is the penumbra.
Some larger sunspots are visible without a telescope (but still with a proper filter). In fact, Chinese astronomers were the first to record the observation of these spots in 28 B.C., probably when the Sun was low on the horizon and atmospheric dust dimmed the Sun enough to see without a filter. Legend has it that a large spot was also seen in 813 A.D. upon the death of Charlemagne.
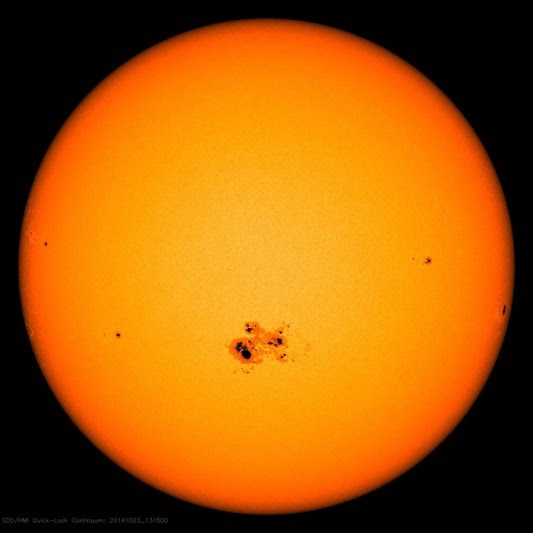
The Sun rotates once every 25 days at the equator and slightly slower towards the poles (remember… the Sun is not solid). So you can use sunspots to observe the Sun's rotation. Spots move from left to right across the surface as seen from the northern hemisphere (opposite in the south). Most spots don't make it all the way around the Sun since they have an average lifespan of just 2 weeks.
At low magnification, say 40x-50x, you will get a full-disc view of the Sun, and if sunspots are present, they will appear quite small, although they are in most cases larger than the Earth. Though the air is often unsteady during the day, try to use as much magnification as you can with your telescope and white-light solar filter to get a close-up view of a sunspot group.
In the mid-19thcentury, after many years of diligent solar observation, the German astronomer Samuel Schwabe noticed the number of sunspots visible on the Sun's disk rises and falls in nearly regular 11-year cycles. In peak years of the cycle, he found, there were spots visible on the Sun most days, and hundreds of spots and groups of spots during the course of a year. In lean years, roughly 5.5 years after the peak, there were weeks or months when astronomers saw not a single sunspot, with fewer than a dozen spots observed during the year.
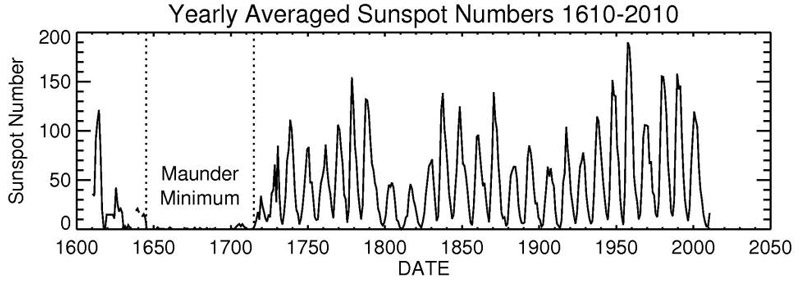
This regular cycle was traced back to the earliest telescopic observation of the Sun in the 1600s, and has been recorded in increasing detail by modern astronomers right up to the present day. (The diagram above shows a measure of the sunspot number over time since the 17th century. The 11-year period is clearly visible).
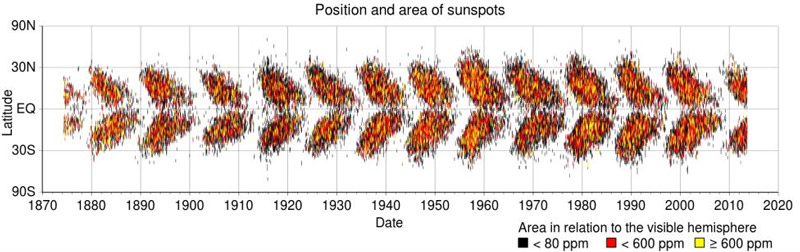
What's even more interesting is where the sunspots occur on the solar disk. As the number of sunspots rises from a minimum, the spots appear north and south of the solar equator, usually in the middle solar latitudes around 40 degrees.
As the cycle continues, sunspots appear closer to the equator until, at the next minimum, most spots appear in a narrow band at the equator. Then, it all starts over again. A plot of the position of sunspots over time, shown below, is called the Maunder diagram or the "Butterfly Diagram".
This periodic change in the number and position of sunspots was a striking discovery. And it's not just the number of sunspots that varies every 11 years. The sunspot cycle also matches up with other activity on the Sun, including violent mass ejections, the size and extent of the outer reaches of the sun called the corona, and the intensity of light and charged particles the Sun blasts out into space to affect the atmospheres and magnetic fields of many planets in the solar system, especially Earth.
This near-regular 11-year variation in sunspots and other solar activity is called the solar cycle. It seems to be a symptom of a complex and dimly understood dynamic process inside the Sun called a "solar dynamo"that generates the Sun's global magnetic field. To make matters even stranger, the magnetic field seems to flip its polarity once every two sunspot cycles, or 22 years, which means the magnetic polarity of the sunspot pairs on the solar disk flips direction from cycle to cycle.
Sunspots cycles are assigned numbers by astronomers starting with the cycle of 1755. In January 2008, the Sun began its 24th cycle. It peaked in 2013-2014, approximately, and will continue until 2019. This cycle has been unusually quiet, with fewer sunspots and decreased solar activity compared to the other cycles of the past century. No one knows why. There have been past periods of quiet on the Sun with few sunspots. The Maunder Minimum from 1650-1720 and the Dalton Minimum in the early 19th century had very few sunspots. They also coincided with a marked cooling of the Earth's climate. Again, no one knows why.
4.1.1 Granules
As you investigate sunspots with your telescope, especially at high magnification, look for evidence of solar granules in the photosphere. These small, grainy structures are the outer layers of the opaque convection zones in the convective layer inside the Sun. Compared to sunspots, granules are small, about 500-1000 km across,and they cover the entire Sun. Granules are the tops of convection cells where hot gas rises up from the interior in the bright areas, spreads out across the surface, cools and becomes denser, then sinks down along the dark lanes between the granules.Each granuleonly lasts for about 20 minutes before it's pushed aside by a new one. The flow of gas within a granule can reach supersonic speeds of more than 7 km/s and causepressure variations that generate waves on the Sun's surface.
4.1.2 Pores
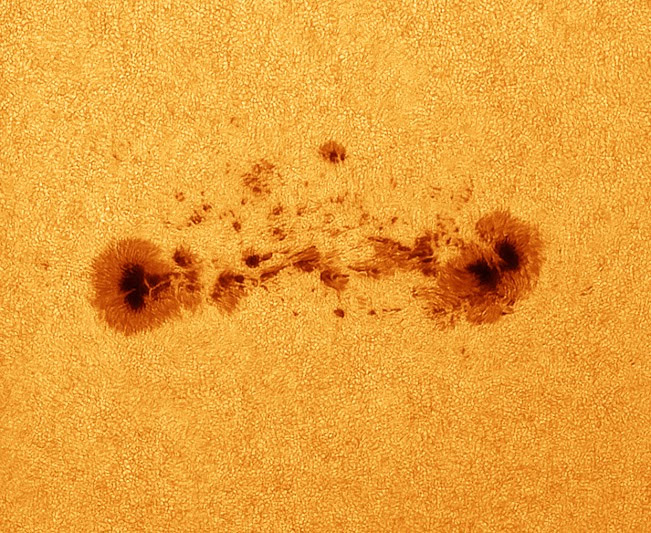
Solar pores are small sunspots without a fainter outer penumbra. They appear to be an early stage of sunspot evolution, so astronomers study them to understand how the magnetic fields evolve to generate activity and convection in the photosphere of the Sun. Pores tend to be much smaller than full-on sunspots, so you need high magnification and steady air to see them with a small telescope. Even Earth-bound professional telescopes have trouble imaging pores, so if you spot these little formations, you have done well!
4.1.3 Faculae
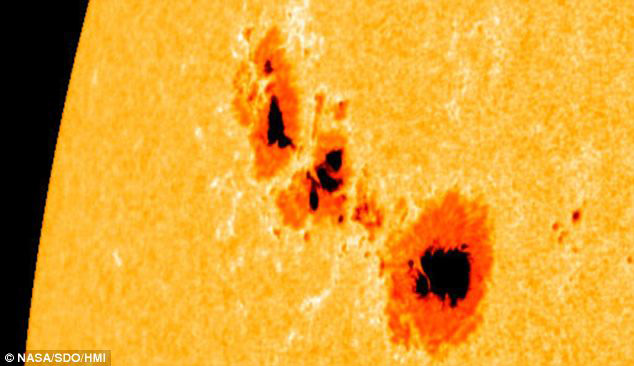
Faculae are bright areas in the Sun's photosphere. They are also caused by magnetic activity, but the magnetic field is concentrated in much smaller bundles than in sunspots. Faculae are hotter than the surrounding photosphere, which is why they appear brighter. They are usually best seen near the darker limb of the solar disk. Sunspots tend to make the Sun look darker, faculae make it look brighter, and during a sunspot maximum the bright faculae slightly overcome the dark sunspots and make the Sun appear about 0.1% brighter at sunspot maximum than at sunspot minimum.
4.1.4 Limb Darkening
When you look at the face of the Sun with a telescope and white-light filter, you're looking as far down as possible into the Sun's photosphere at visible wavelengths. The farther down you can see, the hotter the gas you see, and the brighter it will appear. But as you look along the limb of the Sun, you get a glancing view through the outer layers of the photosphere where the gas is cooler and therefore darker. This effect is known as limb darkening. It's obvious even in a small telescope with a white-light solar filter.
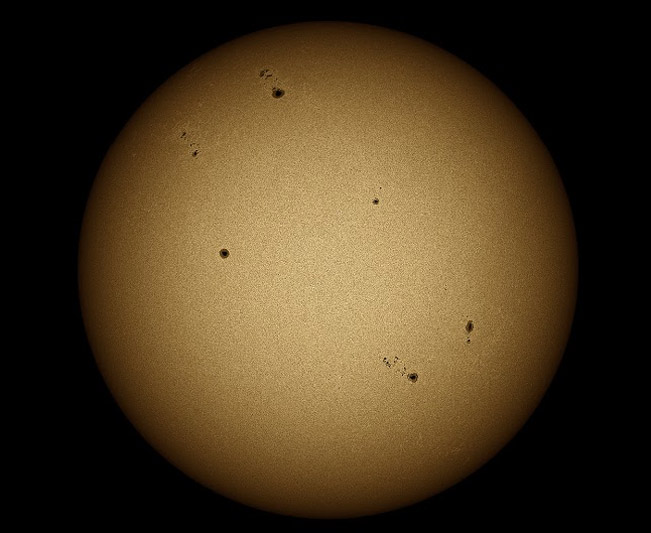
Limb darkening, when measured and quantified precisely, can help professional astronomers determine how the temperature varies as a function of depth the Sun's photosphere, which in turn helps them understand the Sun's complex optical spectrum.
5. A Guide to Hydrogen-Alpha Solar Filters and Telescopes
In this fifth section on solar observing, you learn about another kind of front-mounted solar filter for amateur astronomers, the so-called hydrogen-alpha filter. Unlike white-light solar filters, these optical devices are designed to pass only a narrow band of red-orange light while blocking all other wavelengths of the bright white light from the Sun. With a hydrogen-alpha filter, or a with dedicated hydrogen-alpha solar telescope by manufacturers such as Lunt or Coronado, you can see the dynamic and explosive events in the Sun's chromosphere such as prominences and filaments, solar flares and mass ejection events, and the bright plages in the chromosphere above sunspots. Such filters offer stunning views of the solar disk during periods of solar activity and during the transits of the inner planets and partial and total solar eclipses.5.1 Seeing Above the Sun's Photosphere
As you learned in a previous article, white-light solar filters let you see sunspots and many other intriguing features in the Sun's photosphere, the narrow layer of the Sun where infrared, visible, and ultraviolet light leave the Sun and travel freely into space. The bright white light from the photosphere far outshines the light coming from the chromosphere, the more rarefied layer of glowing hydrogen gas just above the photosphere. The chromosphere holds many fascinating and beautiful features that can be seen with a small telescope. But to see these dynamic features, you need a filter for your telescope that passes only the red-orange light from the glowing hydrogen atoms in the chromosphere while blocking the brighter white light, infrared light, and heat from the photosphere.
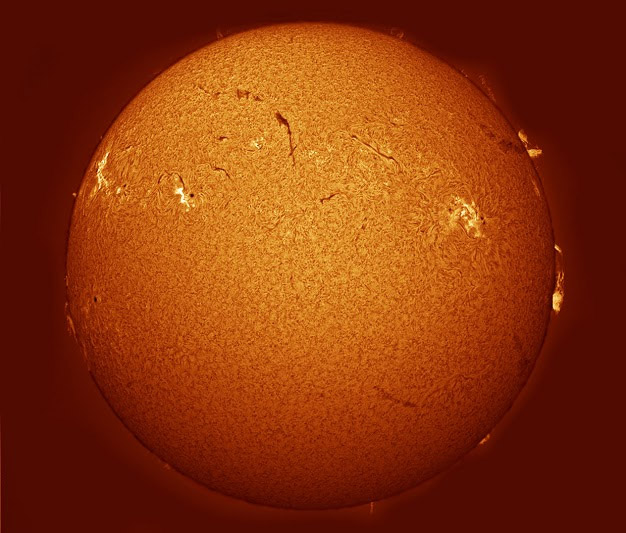
A hydrogen-alpha (H-alpha) solar filter is just such a device. The idea behind these filters is fairly simple. Hydrogen, like all gases, emits light at dozens of fixed wavelengths set by principles of atomic physics. When the lone electron of a hydrogen atom falls from its second to first excited state, it causes the emission of reddish-orange light at 656.3 nanometers to settle accounts. This is the hydrogen-alpha wavelength. A hydrogen-alpha filter passes light from the chromosphere in a narrow band around this wavelength while blocking the overwhelming white light that comes through the photosphere. This filtering effect lets you see only glowing hydrogen gas and gives you the contrast to see the Sun for what it really is: a dynamic, seething, and occasionally violent place where immense amounts of energy and hot gas are flung into space over the course of a few minutes or hours.
5.2 How a Hydrogen Alpha Solar Filter Works
First, a word of clarification and of safety. You may also come across another type of hydrogen-alpha filter for astronomy. Such hydrogen-alpha filters are used for visual observing and photography of emission nebulae in the night sky, nebulae like the Orion or Lagoon Nebulae. But these filters are NOT solar filters, so NEVER use them to observe the Sun. They do not provide sufficient protection and reduction of the Sun's brightness and they are NOT hydrogen alpha SOLAR filters. If you're not sure what kind of filter you have or need, ask before you buy or use.
A hydrogen-alpha solar filter comes in a set with three parts. The main filter is made of two mounted and highly reflective plates called an etalon. The two reflectors in the etalon cause light to bounce back and forth in the small space between them. When the light waves are the right wavelength to interfere constructively inside the etalon, they pass through. Otherwise, they do not. The etalon of an H-alpha solar filter is designed to pass light in a narrow band around 656.3 nm. By its nature, the filter will also pass light in multiples of this wavelength because such light will also interfere constructively in the filter. The spectrum passed by the etalon will resemble a "comb" of wavelengths, only one of which is the true H-alpha wavelength.
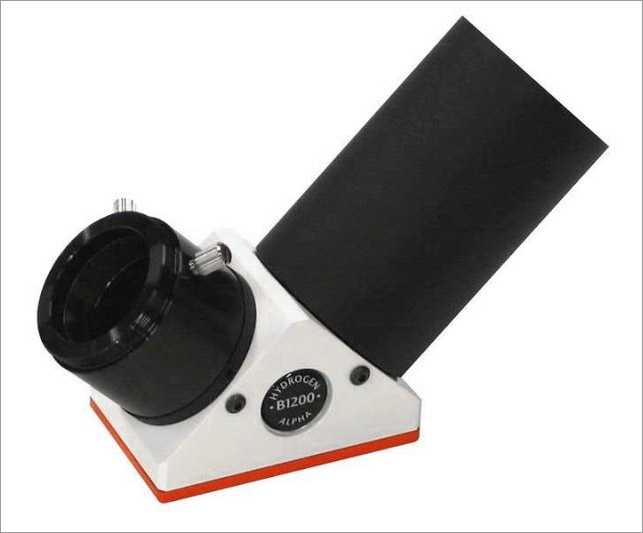
The unwanted light in the "comb" from the etalon is removed by a second component, a solar diagonal with an optical blocking filter. The diagonal takes the place in your telescope of an ordinary star diagonal used for night viewing. The solar diagonal passes only the narrow band of light near 656.3 nm and rejects all others. The mounted etalon filter and the filtering diagonal work as a pair: you must use both elements to enable safe solar observing.
The size of the blocking filter of a solar diagonal is specified in millimeters. Sizes range from 5mm or 6 mm to 20 mm or more. Smaller sizes are suitable for telescopes with shorter focal lengths of 600 mm to 1000 mm. Telescopes with longer focal lengths will produce larger images of the Sun's disk, which means larger blocking filters are required. For a given telescope and focal length, smaller filters are suitable for visual observation of the Sun. A slightly larger blocking filter is usually required for photographic applications to avoid cutting off the Sun's image at the camera sensor.
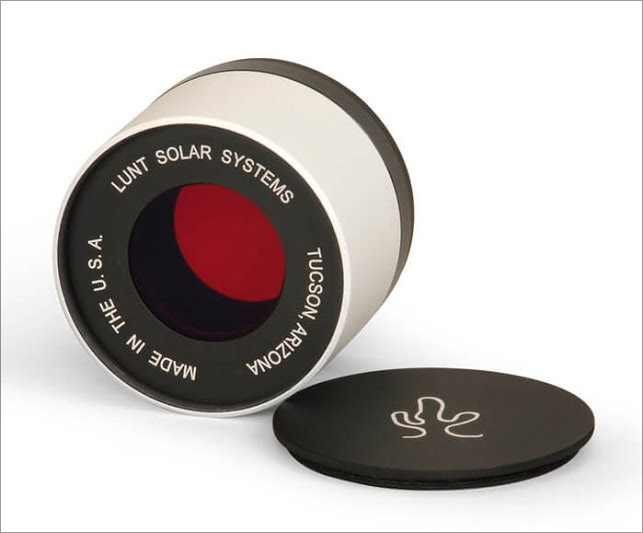
The third part of the H-alpha filter set is a mechanical cell that holds the main etalon filter over the objective of your telescope. Each telescope requires a different mounting cell, so make sure to specify the make and model of your telescope when ordering an H-alpha filter set. Hydrogen-alpha filters are designed to be used primarily with small refractor telescopes, though some are available for small Schmidt-Cassegrain (SCT) or Maksutov-Cassegrain (MCT) scopes. The cell that holds the filter for a SCT or MCT scope must have an off-center aperture for the filter itself because the scope's secondary mirror would otherwise block the light transmitted by the solar filter.
Commercial hydrogen alpha filters come in a range of clear apertures such as 40 mm, 50 mm, and 60 mm, for example. The aperture of the filter does not have to match the aperture of your telescope, although the scope must have sufficient aperture and tube width to accommodate the solar filter and mounting plate. So you can, for example, mount a 40 mm H-alpha filter on a refractor with 80 mm aperture. As always, a larger-aperture filter will give you brighter views and more resolution. The trade off? Larger filters cost more.
And of course, the mounting cell, H-alpha etalon filter, and solar diagonal are easily removed from the telescope after a daytime solar viewing session so you can use your telescope for night time astronomical viewing.
5.3 Tuning an H-Alpha Filter
Once all three elements of the H-alpha filter set are in place on a telescope, you can observe the Sun's image with a regular astronomical eyepiece mounted in the solar diagonal, and you can swap out eyepieces to change magnification. Specialized solar eyepieces are also available. Solar eyepieces are engineered with optical elements and anti-reflection coatings to work only at the H-alpha wavelength of 656.3nm. They typically do not have a wide field of view and are not recommended for viewing objects in the night sky because of their specialized coatings.
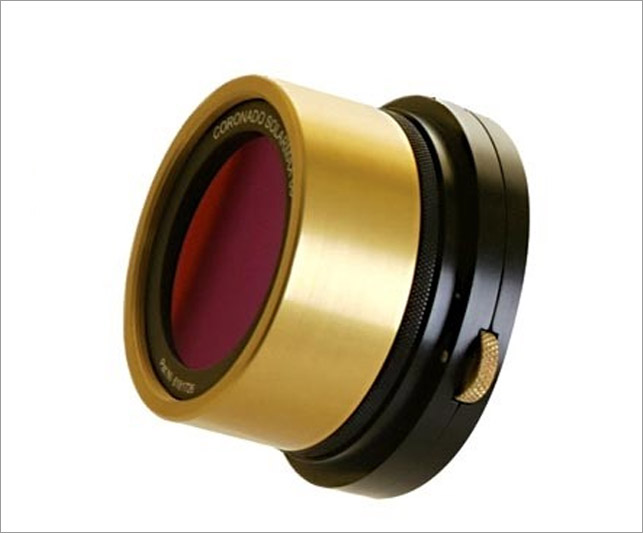
The main etalon filter mounted at the top of the tube also has a mechanism for slightly de-tuning its passband above and below the H-alpha wavelength. Why is tuning necessary? Because many sights in the Sun's chromosphere, such as filaments or some prominences, may be moving towards or away from you, which means their wavelength will be shifted slightly to longer wavelengths (if they are moving away) and to shorter wavelengths (if they are moving towards) according to the principles of the Doppler effect. Changes in atmospheric pressure and ambient temperature of the filter and cell may also change the passband of the filter slightly away from the precise wavelength of H-alpha. The filter tuning mechanism compensates for these factors. Commercial H-alpha filters are manually tuned with a built-in mechanism that either tilts the filter or changes the air pressure within the filter cell. You simply tune or adjust the filter to get the best view of whatever features you are observing.
5.4 The Passband of an H-Alpha Filter
A key feature of H-alpha solar filters is the wavelength passband, which is usually listed in units of Angstroms (1 Angstrom = 0.1 nanometers). The passband is the degree of effectiveness of the filter in blocking other wavelengths on either side of the 656.3 nanometer wavelength of H-alpha. Narrower passbands are better at revealing subtle images in the chromosphere. The least-expensive H-alpha filters have a passband of <1 Angstrom. More expensive filters pass light over a band of <0.7 Angstrom, and the best filters have a stack of two filters that pass light over a band of <0.5 Angstroms, resulting in very striking views of the Sun's chromosphere, though at the cost of some reduction in brightness. Again, as you might expect, narrower-band filters come at a higher cost.
The view of the Sun with H-alpha filters, especially those with passbands of <0.7 Angstroms, can be astounding. The image below shows you what you might see at high magnification.
The downside of these filters is the cost. The smallest filters with a 40 mm diameter will run about $1,500. The 60 mm version, which can give a brighter image and higher resolution, goes for $2500. And a big 90 mm filter sells for an eye-popping $3,000 to $4,000. Telescope not included!
5.5 Hydrogen-Alpha Solar Telescopes
If a separate H-alpha filter set is beyond your budget, or if you have a large compound or Newtonian reflector or other telescope that does not accommodate an H-alpha filter, there is another alternative to consider if you wish to view the Sun. That alternative is a dedicated H-alpha solar telescope.
Coronado, one of the first companies to make commercially available H-alpha filters, was the first to build a dedicated H-alpha solar telescope package. It includes a small refractor and the three elements of an H-alpha solar filter, the etalon filter, a solar blocking diagonal, and an integrated mechanism to mount the filter in front of the objective lens. The H-alpha scope even includes an eyepiece. Called the Personal Solar Telescope (PST), this little package goes for about $700. The aperture of the PST is 40 mm and the passband is <1 Angstrom. This is good enough for views of major prominences and other such features. There is a version of the Coronado PST with a double-stacked filter with an overall bandpass of < 0.5 Angstrom for even more dramatic views of the Sun's chromosphere.
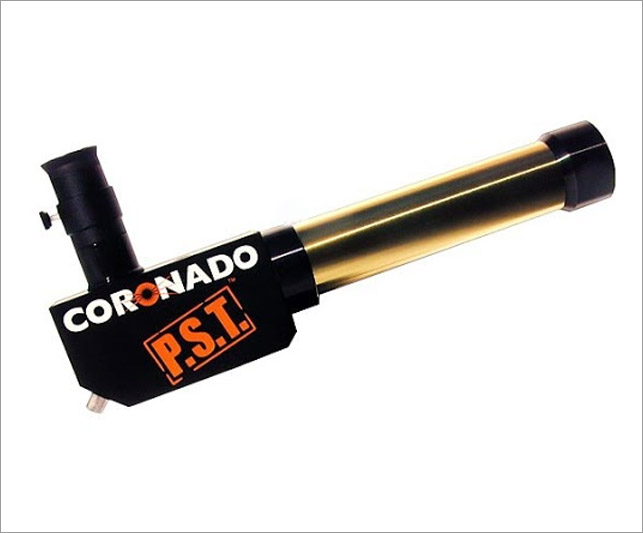
Lunt Solar Engineering, which also sells excellent H-alpha filters and accessories, sells a similar dedicated solar telescope with a 50 mm aperture and <0.75 Angstrom passband for about $800. If are inclined to take up solar observation, these little scopes are well worth the investment.
There are also complete H-alpha solar telescopes with 60 mm and 90 mm aperture for about $1,300+ and $3,500+ respectively depending on the passband of the H-alpha filter and the size of the blocking filter. Larger aperture gives you more resolution, and the correspondingly longer focal lengths enable larger image sizes. For many solar telescopes, the H-alpha etalon filter and tuning mechanism is located inside the telescope tube between the objective lens and eyepiece.
Because dedicated H-alpha solar telescopes are designed to operate at a single wavelength of 656.3 nm, they use very simple singlet objective lenses and simple eyepiece designs. They are only suitable for solar observation and cannot be used for observing other astronomical objects.
6. Observing the Sun in Hydrogen Alpha
6.1 Prominences and Filaments
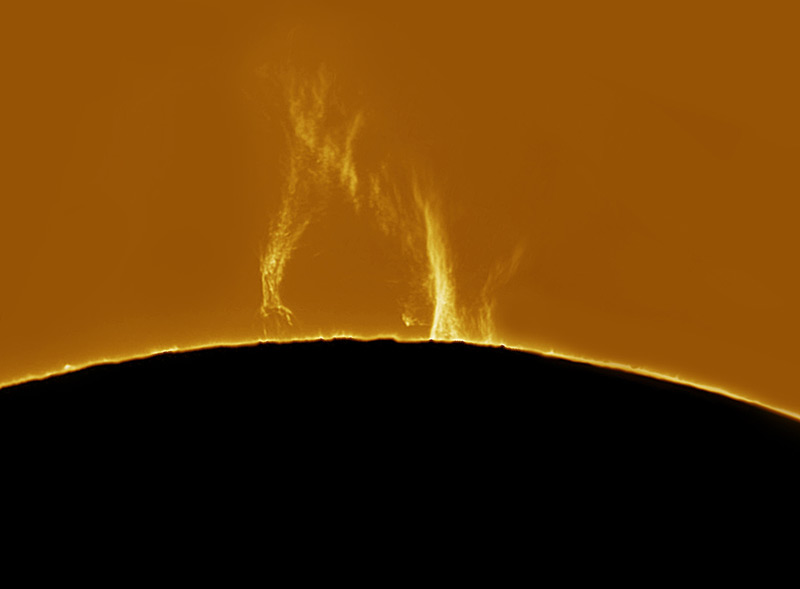
Prominences are dense clouds of gas and charged particles suspended above the photosphere of the Sun by magnetic field loops. With a telescope and H-alpha filter, a prominence looks like a curved flame emerging from the edge of the Sun. Like sunspots, prominences come together over several days and remain suspended over the sun for many more days. But they don't last forever. As the solar magnetic field moves around, the hot plasma in a prominence becomes unstable and falls back into the Sun.
The arcs of plasma in a solar prominence are many times the size of our Earth.
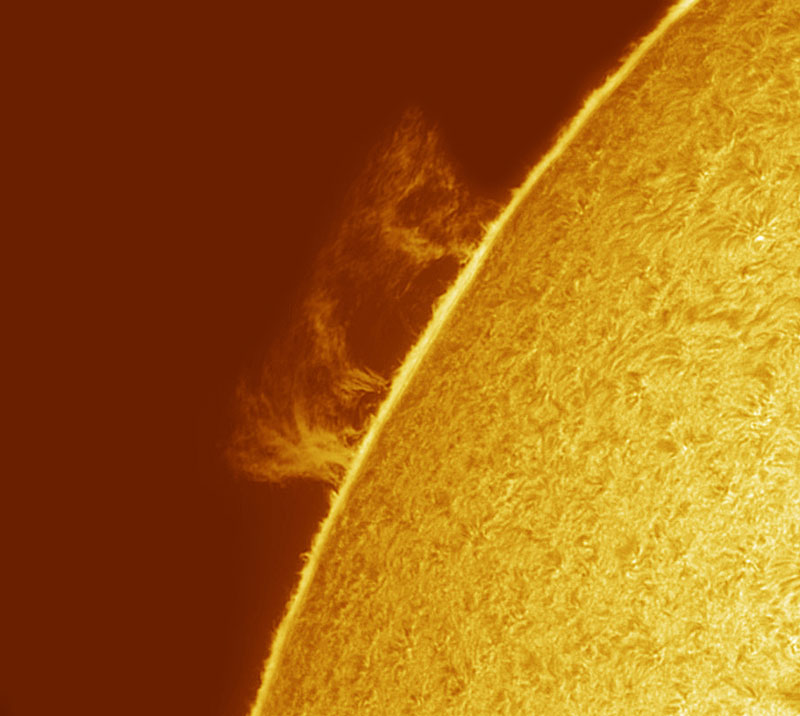
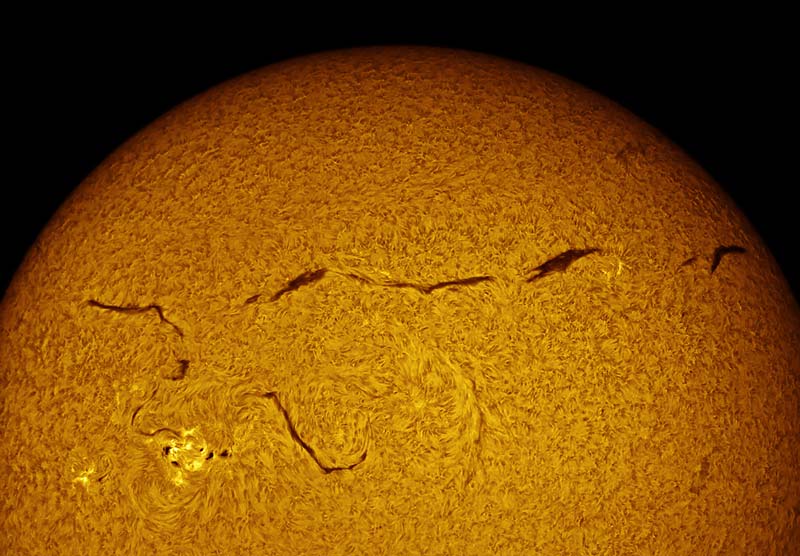
Solar prominences, by definition, are visible along the edge of the Sun. If you see a prominence in the central part of the Sun facing the Earth it's called a filament. So a filament is simply a prominence seen from above from our point of view.They appear as dark rope-like structures etched into the face of the Sun. They also can last for many days before they fade from view.
Both filaments and prominences are only visible at H-alpha wavelengths. If you only have a white-light solar filter, you won't see these structures because the brilliance of the Sun's photosphere washes out their delicate light.
6.2 Plages
A plage is a bright patch visible in H-alpha surrounding a sunspot. Sunspots themselves are not as conspicuous at this wavelength because you're looking higher up in the chromosphere rather than into the photosphere where sunspots take root. Plages also seem to be associated and coincident with faculae in the photosphere, though it's not clear how they are related, and faculae are visible mostly in white light.
6.3 Ellerman Bombs
Ellerman bombs are another feature associated with sunspots. They are small, bright structures that form in anactive solar region, usuallya region of emerging magnetic flux ora region on the edge of a sunspot where the magnetic field is breaking through the photosphere. Ellerman bombs are challenging to see. They usually last less than 5 minutes before they quickly fade. They are best seen in H-alpha by tuning the filter slightly off the center of the H-alpha wavelength. These features are named after the American astronomer Ferdinand Ellerman. They are sometimes called a Severny moustache.
6.4 Flares
Solar flares are gigantic releases of energy from the Sun. They only last for a few minutes to approximately an hour and can release the equivalent energy of millions of hydrogen bombs. The energy is blasted into space as gamma rays, X-rays, protons, and electrons, and visible light.
Solar flares occur near sunspots at the regions between magnetic fields of opposite polarities. They occur in three stages. First comes the precursor stage, during which X-rays are released. In the second stage, protons and electrons are accelerated and radio waves, hard x-rays, and gamma rays are emitted. The gradual build up and decay of soft x-rays can be detected in the third 'decay' stage. When flares occur near the limb of the Sun, it's possible to see hot material ejected into space like a giant flame pushing outward. On the face of the Sun, a flare can appear as a sudden brightening of a small region on the visible surface in H-alpha and in white light. They are easier to see in H-alpha, but very bright flares can be seen in the photosphere with a white-light filter as a sudden increase in brightness near a sunspot.
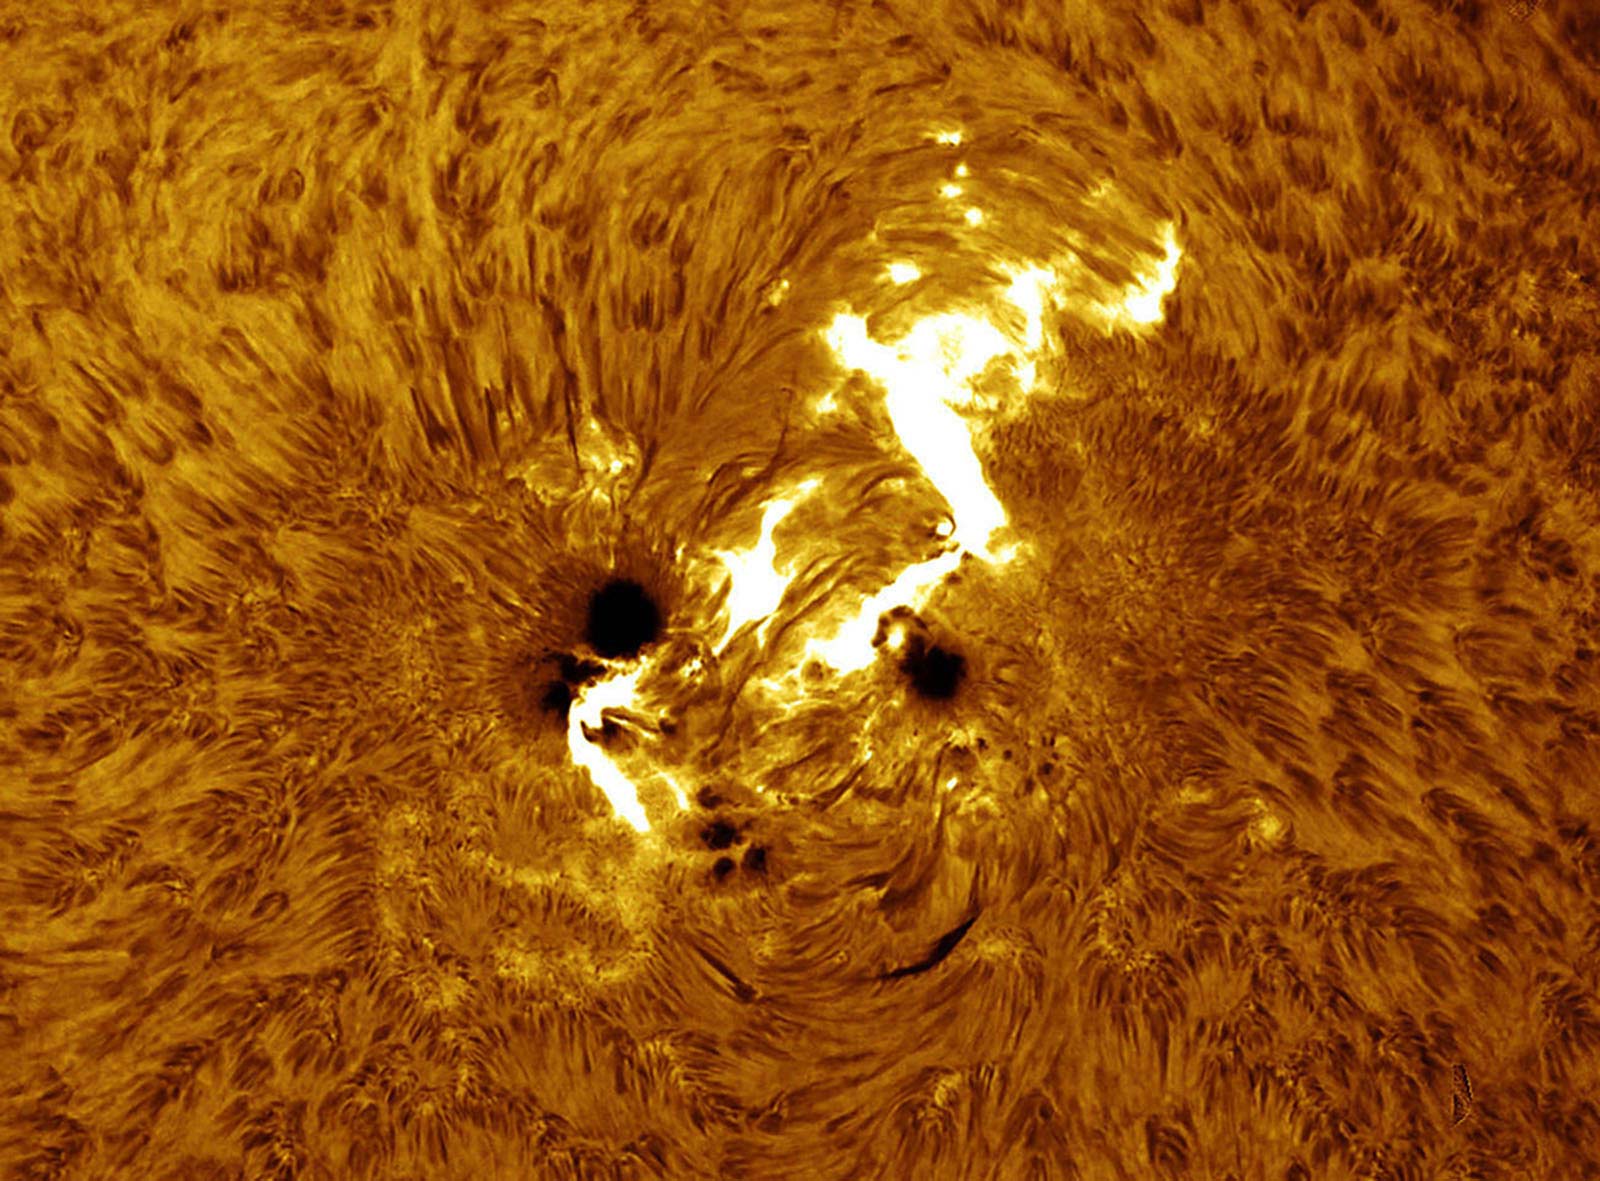
Solar flares are not uncommon, and the frequency at which they occur is related directly to the sunspot cycle. But seeing a solar flare as it happens, either in white light or H-alpha, requires some good luck because they are so fleeting. Looking close-up at higher magnification at a sunspot group gives you far better chance of seeing a solar flare in the act.
Flares that release energy and particles towards Earth are of particular interest to astronomers and satellite and power-grid engineers. The visible light, X-rays, and gamma rays arrive at the speed of light just eight minutes after the flare erupts. The high-energy charged particles travel much slower and arrive at Earth a few days later. These particles interact with the Earth's magnetic field and atmosphere, causing bright and widespread auroral displays, damaging surges and outages in terrestrial power systems, damage to the electronics of satellites, and potentially mortal danger to in flight astronauts. For these reasons, NASA and the National Oceanic and Atmospheric Administration (NOAA) in the United States monitor solar flare activity closely.
Astronomers classify flares according to their energy output. The most powerful flares are called "X-Class". M-Class flares have a tenth the energy of X-Class, and C-Class flares have a tenth of energy of M-Class flares.
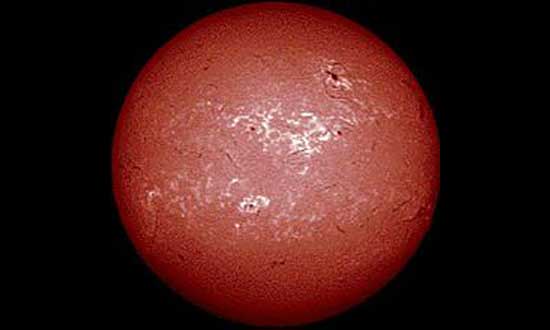
6.5 Chromospheric Network
The chromospheric network is a web-like pattern that's most easily seen visuallywith ahydrogen-alpha filter. The network outlines the larger "supergranule" cells, which are larger cells of material containing thousands of smaller granules. This feature is brighter and therefore hotter than the rest of the chromosphere. The extra heat comes from the motion of hot gas concentrated by magnetic field lines in the supergranules. The visibility of the network varies, so look for it each time you observe the Sun with an H-alpha filter.
6.6 Spicules
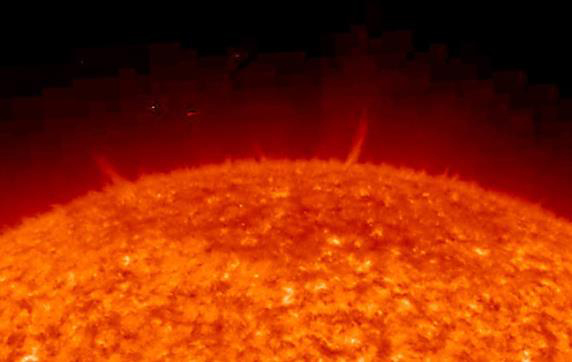
Spicules are small short-lived jets of material that move directly upward from the Sun's surface. They are also caused by magnetic activity and rise at speeds of 20 km/s to heights of several thousand kilometers. After 15 minutes or so, they collapse and fade.
Spicules have a diameter of about 500 km. There are many tens of thousands of spicules on the Sun at any one time.
Because of their small size, high magnification is required to spot these strange little eruptions along the limb of the Sun. They look like blades of orange grass.
7. Observing the Sun in Ca-K, Ca-H and Other Narrow Bandwidths
7.1 Overview
In previous sections of this article on observing the Sun, you discovered what to observe in the Sun's photosphere, the region of the solar atmosphere that emits a broad band of brilliant white light. You also learned how to evaluate and select white-light solar filters to safely observe features in the photosphere such as sunspots, faculae, and granulation with a telescope or binoculars. More recently, you discovered how observing the Sun with a narrow band solar filter that passes only red-orange light from hydrogen atoms at 656.3 nm can reveal features in the Sun's chromosphere such as solar prominences that are not visible in white light.
In this section, you will learn about another narrow band of light generated in the chromosphere, in this case the so-called Ca-K and Ca-H lines generated by calcium ions in the violet region of the spectrum. These lines show lower regions of the Sun's chromosphere and distinctive views of many solar features. Observing the Sun at these wavelengths, as well as at other lesser observed wavelengths such yellow light near 589 nm generated by sodium atoms, gives views and images of the Sun's chromosphere that complements H-alpha and white light observations.
7.2 Light from Calcium Ions: The Ca-K and Ca-H Lines
While most of the Sun is made of hydrogen and helium, there are traces of heavier elements inside the Sun and in its outer atmospheric layers. The complex spectrum of the Sun's atmosphere in which thousands of dark emission lines appear comes from these heavier elements which include calcium, sodium, iron, magnesium, and many others.
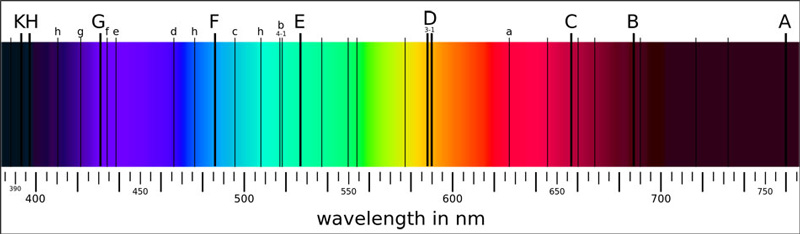
Calcium atoms that have lost a single electron, the so-called Ca-II ('calcium two') ions, emit and absorb light at several wavelengths, most notably at 396.9nm and 393.3nm in the violet region of the spectrum. These are the H and K lines of singly-ionized calcium, respectively. Compared to light from hydrogen alpha at 656.3 nm, these emission or absorption lines are broader in wavelength, which means solar filters that isolate and pass the light of these atomic transitions need not be as narrow as H-alpha filters. An effective H-alpha solar filter has a pass band of 1 angstrom or less (1 angstrom = 10-10 m). But solar filters that pass Ca-K or Ca-H have passbands of 2-10 angstroms.
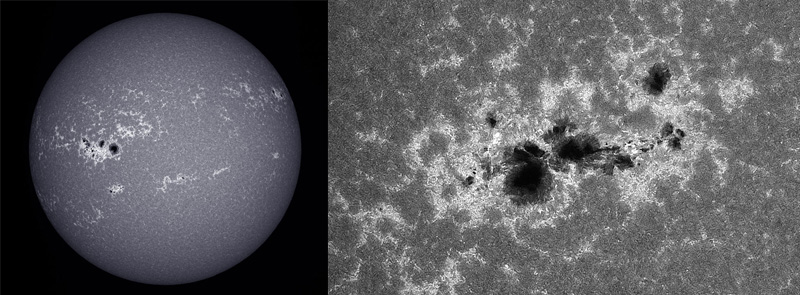
Like the light from H-alpha, the light from Ca-H and Ca-K emission originates in the chromosphere. But it comes from the cooler and lower regions where the chromospheric features take on a slightly different appearance. At these wavelengths, the chromospheric network, the web of light-colored lines that weave through this part of the Sun's atmosphere, takes on a more prominent light-on-dark appearance. With narrower-band Ca-K and Ca-H filters, solar prominences are also visible along the limb, while dark filaments contrast nicely against the disk. Plages appear as bright cloud-like regions near sunspots, and the sunspots themselves are dark with an apparent structure in the violet spectrum quite similar to what is visible in white light. The brightness of light visible from Ca-K and Ca-H lines is strongly influenced by the local magnetic field near a solar feature. This gives rise to additional definition and contrast of regions and features in the lower chromosphere at these wavelengths.
Most amateur solar observers use Ca-K filters with their telescopes. Because the eye is not very sensitive at these violet wavelengths, which is especially true for older observers, the solar disk and its features are very hard to see visually at Ca-K and Ca-H wavelengths. Hence these filters are not usually used for visual observation of the Sun but are only used for imaging applications. Ca-H, which is 3.6 nm longer in wavelength and therefore slightly easier to see, is the preferred wavelength for visual observation, but this light is still hard to see visually. However, Ca-H filters require narrow bandwidths and more careful engineering because they must exclude the adjacent wavelength of hydrogen emission at 397.0 nm (the so-called H-epsilon transition). So Ca-K solar filters are far more common for amateur solar observation.
In this violet end of the spectrum, whether anything is visible at all depends quite strongly on the observer's eye. Generally, younger observers can see more detail at Ca-K and Ca-H wavelengths, but older observers who have had cataract surgery may also see some detail. Even if the overall solar disk is faintly visible to the eye of lucky observers at Ca-K and Ca-H wavelengths, it may be difficult to resolve any detail during visual observation.
Because of the challenge of visual observations in this wavelength range, solar observers most commonly use Ca-K filters and telescopes to image the Sun, either with suitable CCD or CMOS astronomy cameras or live webcam or video astronomy cameras constructed to operate in the violet region of the visible spectrum. The output from a video camera can be outputted to a video monitor for live solar viewing at Ca-K wavelengths.
7.3 Options for Ca-K and Ca-H Solar Filters
To observe and image the Sun at Ca-K or Ca-H wavelengths, it is essential to equip a telescope with an appropriate filter assembly that is intended for safe solar observation or imaging. There are a number of solutions for Ca-K including:
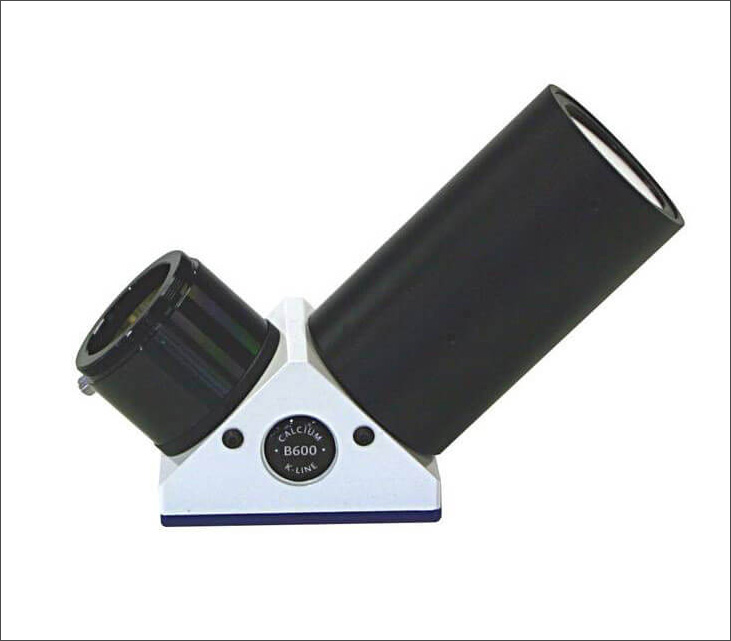
Lunt Solar Ca-K Diagonal: Lunt Solar makes a dedicated Ca-K diagonal for astronomical telescopes, generally refractors with ‹100mm objectives. These modules incorporate a Ca-K filter that passes light in a 2.4 angstrom band and a blocking filter to reduce the Sun's light to a safe level. The Ca-K diagonal simply slides into a 2-inch focuser of an astronomical telescope and it is ready to go. The module can be ordered with blocking filters of a variety of apertures to match the image size produced by telescopes from 600mm to 3400mm focal length.
Lunt also makes a Ca-K module package for their Lunt 152THa hydrogen alpha telescope. This package includes the Ca-K diagonal and a focuser. The user simply removes the H-alpha filter assembly and focuser on the telescope and inserts this Ca-K assembly to turn the Lunt 152THa into a Ca-K scope.
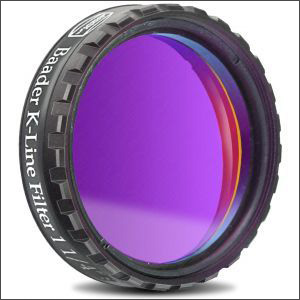
Baader Ca-K Solar Filter: Baader supplies a Ca-K 1.25" filter which threads into a standard astronomical eyepiece, if the observer wants to attempt visual observation, or into a camera nosepiece for imaging. The filter has a bandwidth of 80 angstroms (8nm) and MUST NOT be used as a stand-alone solar filter--it passes far too much light and can lead to immediate damage of your eye or imaging equipment. To reduce light to a safe level, the Baader Ca-K filter comes with a sheet of Baader AstroSolar film which is used to make a white-light solar filter than mounts over the objective of a telescope to reduce the Sun's light to a safe level before passing through the Ca-K filter. For better image quality, a Herschel wedge or similar solar wedge can be used in place of the AstroSolar film to reduce the solar intensity to a safe level for imaging and observation.
The Ca-K filter and AstroSolar film, which are sold as a package, are a more cost-effective solution than a specialized Ca-K module. However, the wide bandwidth of this filter (80 angstroms) produces a reduced contrast compared to many other Ca solutions, and this makes it difficult to see delicate features like solar prominences at the Sun's limb.
Research-Grade Ca-K Filter: DayStar Filters offers a research-grade Ca-K filter with a bandwidth of 2 angstroms for telescopes of long focal ratio (f/15 or greater). This filter provides excellent contrast for indoors visual observation or for imaging. This is a solution for serious and well-heeled solar observers as these units begin at about $4,000.
Most amateur solar observers image or visually observe the Sun at H-alpha or Ca-K wavelengths. But as mentioned above, the Ca-H line at 396.9nm is a slightly better choice for visual observation because the eye is more sensitive at this slightly longer wavelength (compared to Ca-K). High-end commercially available solutions for Ca-H observation include a research-grade Ca-H filter from DayStar Filters.
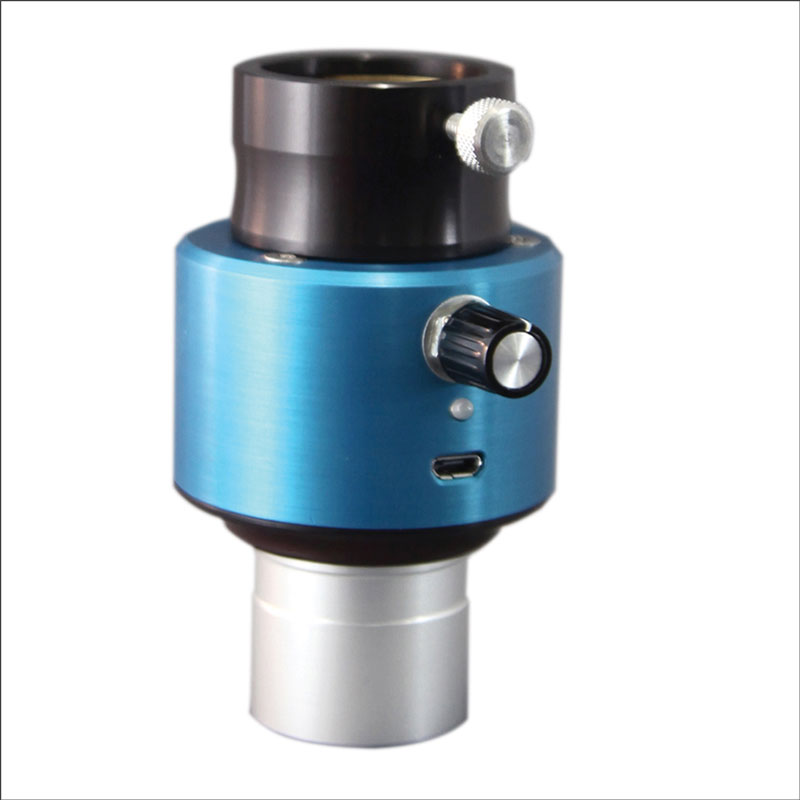
DayStar Filters also makes a line of solar 'eyepiece filters'--brand named the Quark- that operate at several wavelengths for solar observation, including Ca-H and H-alpha. The line of Quark filters are engineered to work with refractors, most commonly, though H-alpha versions can work with Schmidt-Cassegrain and Maksutov-Cassegrain telescopes at some solar wavelengths. Like an eyepiece, the Quark fits into the telescope diagonal and requires no additional filtering when used with refractors of less than 100 mm aperture. Just insert the DayStar Quark into your diagonal, power it up for a few minutes, insert an eyepiece, and observe.
Larger telescopes need an extra energy rejection filter (ERF) to keep the image brightness at a safe level and reduce heat buildup in the telescope tube when using the Quark. The Quark incorporates all the optical filter components necessary for safe narrow band solar observing. It also includes a built-in 4.2x Barlow lens, which increases the magnification and the image size. Unlike other narrow band solar filters, the Quark requires an external power source to control the temperature of the sensitive optics inside. The Quark Ca-H solar eyepiece works best with refractors of f/7 or slower and the bandwidth is around 5 angstroms.
7.4 Observing the Sun at Other Wavelengths
Neutral sodium (Na) atoms emit light at two wavelengths, 589.0nm and 589.6nm, that are known as the Na-D lines. Observations of light emitted by sodium at these wavelengths, which are in the yellow region of the spectrum, show a very high level of detail in granulation and in magnetic-field effects such as the footprints of solar flares in the lower chromosphere. DayStar Filters offers a research-grade dedicated Na-D solar filter assembly and a Quark solar eyepiece that passes sodium D.
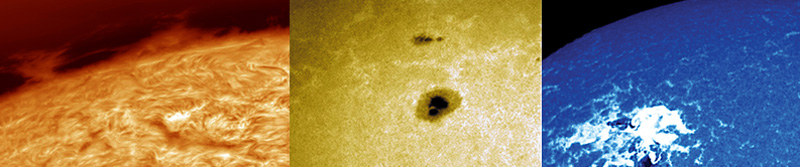
Advanced solar observers and professional astronomers sometimes image the Sun with a filter that passes narrow band light at another wavelength, 587.6 nm, which corresponds to the so-called D3 line of helium in the yellow region of the spectrum. It is quite close to the Na-D lines, but it shows additional sunspot detail, supergranulation, plage, flare footprints, and absorption in magnetic regions.
8. Accessories for Solar Observing
If you're interested in casual observation of the Sun or serious solar observation and imaging, there are a few accessories that make solar astronomy safer, more efficient, and more enjoyable. This section examines commonly used accessories for observing the Sun in white light or H-alpha.8.1 Solar Binoculars
Even the largest solar features are hard to see with just your eye and a safe solar filter, so a little magnification helps a lot when observing major sunspot groups, eclipses, and planetary transits across the face of the Sun. For casual 'grab and go' observation of these events, a pair of binoculars is the ideal tool.
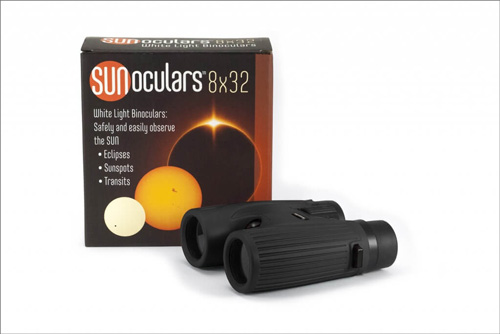
White light filters, described earlier, are available to fit over the objective lenses of many sizes of standard binoculars. Baader AstroSolar filters, especially, give excellent views of the Sun when securely fit over both objective lenses of a pair of binoculars. These filters are available in many sizes. Meade has also announced their EclipseView 10x50 solar binoculars which feature removable solar filters. But a pair of dedicated solar binoculars with built-in solar filters makes solar observation even more convenient. Lunt Solar Systems makes a line of dedicated pocket-sized 6x30 miniSUNocular and 8x32 SUNocular solar binoculars with non-removable white-light solar filters that reduce the Sun's intensity, including infrared and ultraviolet light, by a factor of 10-5 or more which makes them safe for visual observation. Celestron have also announced the introduction of 10x25 and 10x42 EclipSmart solar binoculars, but these have not been released yet.
8.2 Solar Finders
Most telescopes show only a very small part of the sky, so most observers use a finder, a small telescope or non-magnifying reflex device that helps with aiming a telescope quickly and accurately at a celestial object. Finders are also useful for finding the Sun, but standard astronomical finders MUST NOT be used for this purpose because the intense light of the Sun poses the risk of quick and severe eye damage or permanent blindness. Standard astronomical finders should be covered with their dust caps during solar observing sessions to reduce the risk of looking through a finder.
Standard white-light solar filters, which are placed securely over the finder's objective are available in small sizes for finder scopes. But for frequent solar observation, or for a dedicated solar telescope, it makes sense to get dedicated solar finders. Some manufacturers such as Orion make a dedicated 9x50 solar finder with a white-light filter.
The Sun is extremely bright, however, so a finder with an objective lens is not as important as when looking for faint night-sky objects. A pinhole finder such as the Televue Sol-Searcher, is less expensive and easier to use than a magnifying finder. This little device uses a small hole and a translucent projection screen to help aim a telescope at the Sun. When the finder is aligned with the telescope's optical axis, the observer simply moves the telescope until the Sun's image is centered on the screen. This is a much safer way to aim a scope at the Sun because you are looking at the finder, not through it.
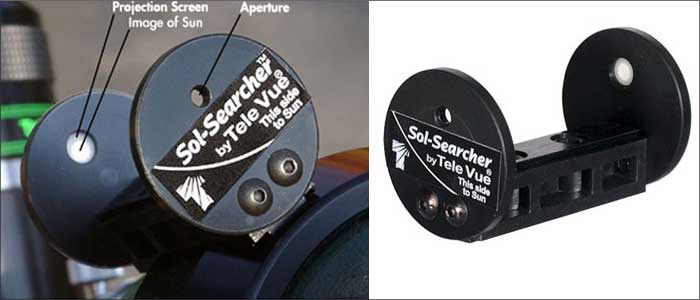
ScopeStuff also makes a solar reflex finder with an adjustable aperture to make it easier to align the finder with the telescope. The finder can be mounted on the base of a Telrad reflex finder.
8.3 Solar Eyepieces
Which type of eyepiece should you use for observing the Sun? With a telescope equipped with a white-light solar filter or a hydrogen-alpha solar filter, nearly any standard astronomical eyepiece gives an acceptable view. However, many astronomical eyepieces are designed with multiple lens elements that are optimized for observing faint objects with a wide and flat field of view. When observing the Sun, the many optical surfaces in these eyepieces can create ghost images, a glow around the solar image, and annoying 'kidney-beaning' in which it becomes necessary to hold your eye at just the right place to see the full field of view.
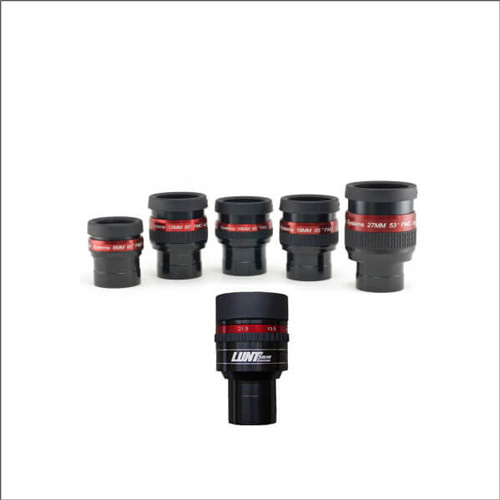
To enhance white-light views of the Sun, Lunt Solar Systems introduced a line of solar eyepieces with fewer optical elements and enhanced anti-reflection coatings to provide high-contrast views of the Sun with dark backgrounds and reduced ghosting in white light or H-alpha. These eyepieces, which come in focal lengths of 8mm, 12mm, 16mm, 19mm, and 27mm, also work well for night-time astronomy. Lunt also makes a popular solar zoom eyepiece with an adjustable focal length of 7.2mm to 21.5mm. When used to observe the Sun, these eyepieces MUST be used with a telescope equipped with a safe white-light or H-alpha solar filter.
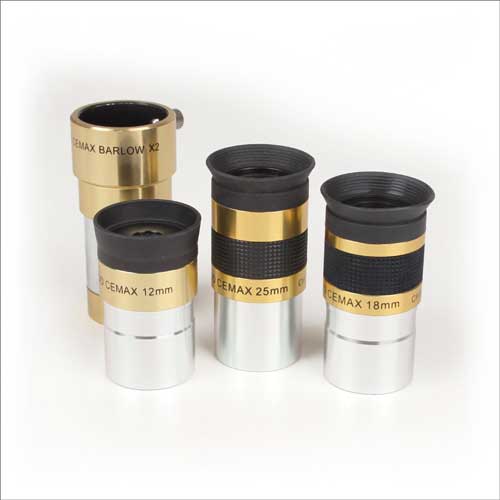
For dedicated H-alpha observation in the very narrow band around 656.3 nm, Coronado manufacturers their CEMAX line of solar eyepieces and a Barlow lens with excellent anti-reflection coatings at this specific wavelength. These eyepieces do not include any filters, so when used to observe the Sun, these eyepieces MUST be used with a telescope equipped with a safe white-light or H-alpha solar filter.
8.4 Baader Solar Continuum Filters
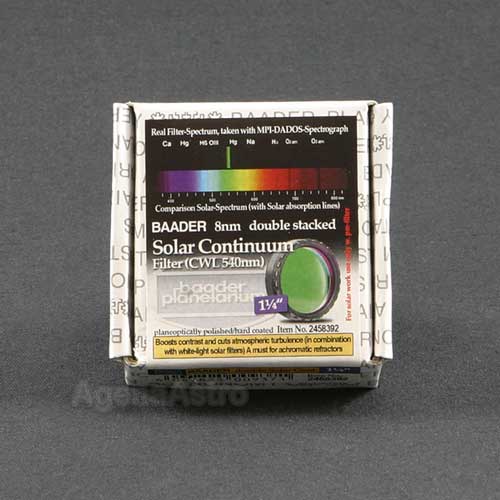
The Baader Solar Continuum filter is a useful secondary optical element for solar observation and imaging. It cuts all light from the broadband solar spectrum except for a narrow spectral region around 540 nm (in the green region of the spectrum). Observing at this wavelength improves the contrast of solar granulation, the structure of sunspots, and other features like faculae. These filters pass light in the spectral region where the human eye is most sensitive, and many experienced observers find the added contrast at this wavelength is an improvement over observing the Sun in purely white light.
The Baader Solar Continuum filter is a secondary filter only. It MUST be used with a broadband white light filter or solar wedge to ensure the Sun's dangerously bright light is reduced to a safe level for visual observation and imaging. The filter does not work with any solar filter that does not pass green light at 540nm.
Baader also produces a double-stacked solar continuum filter that consists of two back-to-back filters tilted slightly to avoid reflections between them. The double-stacked filter provides a narrower bandwidth around 540nm to provide more detail and contrast on features in the solar photosphere such as granulation and sunspots and better rejection of out of band light in the red and blue region of the spectrum.
8.5 Solar Observing Hoods and Hats
It's an occupational hazard, but when you're observing the Sun, chances are you're going to be bathed in fairly bright sunlight. Some of this light enters your eye and decreases image contrast, and some falls onto exposed skin and causes a sunburn and an uncomfortably warm temperature. That's why many solar observers use some form of observing hood. By draping the hood over your head and eyepiece, you improve image contrast and cut down on heat and light. Ideally, the hood should have an opaque black interior to reduce light, and a reflective exterior to reduce the absorption of heat into the hood. You can make your own hood, or try the well-reviewed solar observing hood from Telegizmos (it was a Sky and Telescope Hot Product for 2016).
If you don't use a solar hood, or if you're helping during solar observing outreach events, a solar hat is a very useful accessory. With a thick cap and long neck flap, a solar hat keeps your head covered and prevents sunburn. A specialty solar hat from Lunt, for example, is constructed of a UV protectant material, and includes a small pocket and a clip to prevent the hat from being blown off in the wind.

9. The Basics of Solar Imaging
9.1 Overview
Visual observation of the Sun, whether in white-light or in narrow band like H-alpha, rewards the observer with ever changing and close-up views of a major star in action. Features like sunspots, solar flares and prominences, faculae and tiny spicules are fascinating to watch. And special events such as planetary transits or total and partial solar eclipses add to the pleasure of amateur solar astronomy. Eventually, however, there comes a time when you wish to record your observations by capturing images of the Sun. In this article, you get a few tips and suggestions to get you started imaging the Sun with white-light solar filters and narrow-band solar filters such as H-alpha and Ca-K.
9.2 Imaging the Sun with a Smartphone or Point-and-Shoot Camera
Aiming an unfiltered camera at the Sun for any length of time may cause damage to the sensor, so it's essential to have a solar filter in front of the camera to completely cover the lens and keep the light to a safe level for the camera sensor and your eye. Filters such as solar eclipse cards or eclipse glasses reduce the intensity of the Sun's light by a factor of 100,000 or more, but they still give a sufficiently bright image for the camera's sensor. You can manually hold these simple filters in front of a smartphone or point-and-shoot while imaging. However, using only a solar filter and camera results in a very small image of the Sun's disk, even with zoom lenses of 200mm to 300mm focal length (35mm equivalent). So you're not likely to see any solar features such as sunspots using most smartphones and small camera.
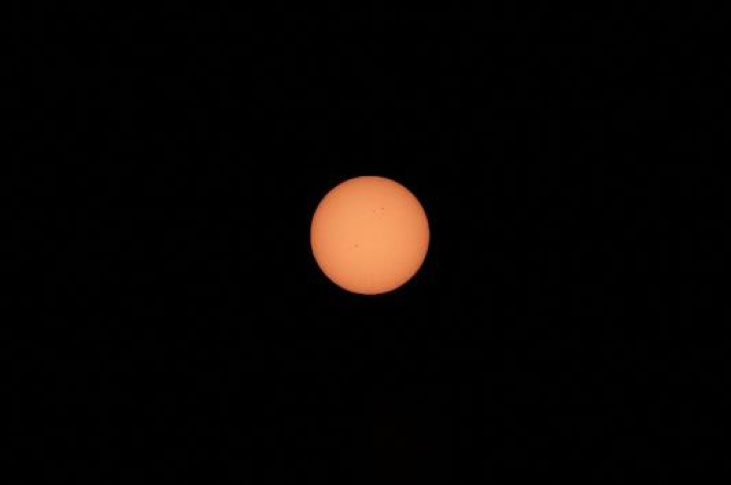
Afocal imaging, in which you snap an image of the Sun through the eyepiece of a properly filtered telescope, offers a solution and you can get a reasonably good solar image with this approach with a smartphone, small camera, or even a DSLR.
To do afocal imaging, you adjust the focuser of your telescope to achieve a good visual solar image in your eyepiece, then simply hold your camera up to the eyepiece, adjust the camera focus to get a sharp image in the viewfinder or on the screen, and take the picture. You can hold the camera by hand, but to get the best results, invest in a mechanical holder that secures the smartphone or camera to the focuser of the telescope to keep the camera in place and stationary as the image is taken. Heavier point and shoot cameras or DSLRs with a lens can be placed on a camera tripod and moved close to the telescope eyepiece of the telescope. If possible, use a timer or remote shutter release to take the image with the camera or phone without having to touch it. As with any sort of imaging through a telescope, a solid mount helps with getting a sharp image. Because camera shutter times are fairly fast for solar afocal imaging, a tracking mount is not critical.
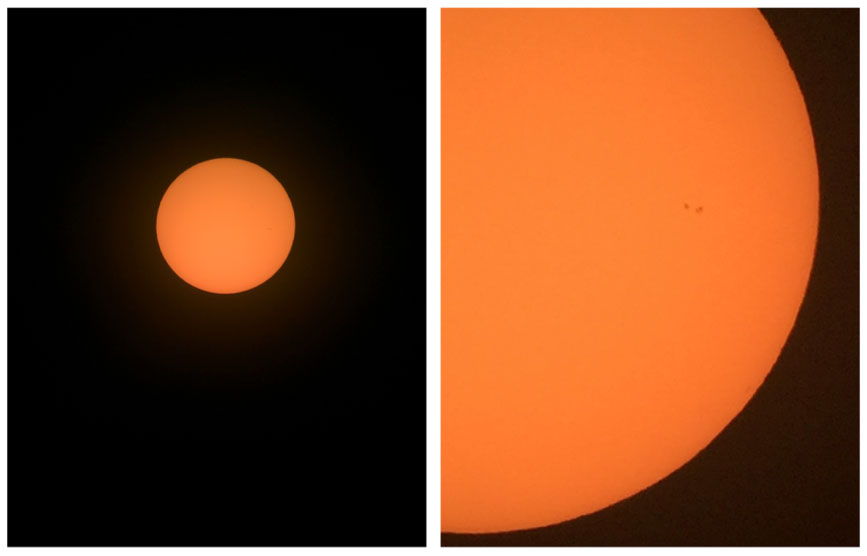
With afocal solar imaging, you can adjust the camera's optical or digital zoom to get close-ups of the image produced by the eyepiece. You can also switch eyepieces in the telescope to change the magnification and true field of view.
As for camera settings, use ISO200 or 400 and set the widest possible aperture (ie. the lowest f-stop number such as f/2.8 or f/4). Try a range of exposure times. Since even the filtered Sun is quite bright, start with something in the range of 1/30s to 1/500s. Shorter exposures capture more detail of sunspots and other features on the face of the Sun in white light. If you are using an H-alpha solar filter or dedicated H-alpha solar telescope, then you can try short exposures to properly image the solar disk and longer exposures to reveal solar prominences, if they are present, along the limb of the Sun.
White-light solar images can be taken in the camera's standard color mode. However, if your camera has a black-and-white setting, give it a try. It may result in better focusing and image contrast of photospheric images like sunspots and faculae.
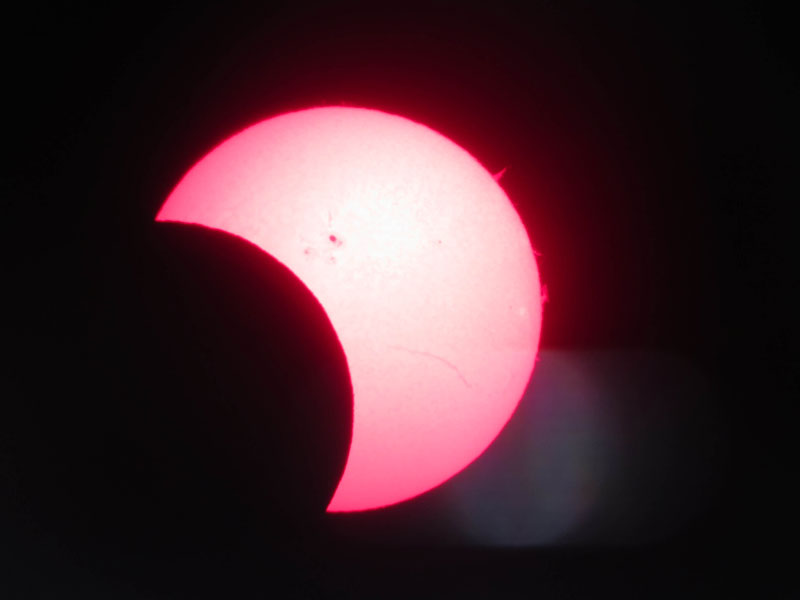
If you're imaging with a telescope and H-alpha filter or a dedicated H-alpha solar telescope, then the camera sensor will see almost completely monochromatic light at 656.3nm. Because most commercial cameras use a three-color (red-green-blue) Bayer filter in front of the sensor, this results in blurry and reddened images. You will get better afocal solar images in H-alpha if you use black and white mode, although the presence of the Bayer filter, and the additional IR filter that's in front of the sensor in many cameras, will still result in some loss of image quality.
While afocal solar imaging is easy and can be done with many cameras, it does have some disadvantages. Because there are many optical elements in the eyepiece and camera lens, there is some image distortion, light loss, and possibly ghost reflections. The images may also be cut off around the edges, an effect known as vignetting, if the camera aperture is too small to capture the full exit pupil of the eyepiece.
9.3 DSLR Solar Imaging
With their bigger sensors, DSLR cameras can be also used for solar imaging to get much better images than smartphones or point-and-shoot cameras. They also accommodate a wide range of interchangeable lenses. Like point-and-shoot cameras, DSLR cameras, when mounted on a tripod, can be used for afocal imaging through a telescope and eyepiece. But far better image quality results when you image through a DSLR camera lens or directly through a telescope.
The image of the Sun will be quite small with DSLR camera lenses of less than 200mm (35mm equivalent). But if you have a zoom lens or a telephoto lens with a focal length longer than 400mm (35mm equivalent) or about 300mm (for crop-sensor or APS-C DSLR cameras), you can get a large enough image of the Sun's disk to see some detail. With such long focal lengths, you will need a solid tripod to hold the camera steady. And unless you are imaging the Sun when it is totally eclipsed by the Moon, you MUST place over the DSLR camera lens a safe solar filter such as the Baader AstroSolar white light solar filters. These filters come mounted in a wide range of sizes to accommodate long and short focal length camera lenses.
Connecting the DSLR camera directly to a solidly-mounted telescope gives you even larger image size since the telescope acts as a very long focal-length camera lens. The DSLR camera body is mounted to the telescope such that the sensor lies at the focal plane of the telescope's lens or mirror. This sort of approach is called prime focus imaging. If you are going to do prime focus imaging of the Sun with a telescope, you MUST use a safe solar filter over the objective of the telescope to prevent damaging your camera or your eyes.
To use a DSLR at prime focus, remove the camera lens and insert a T-ring into the camera's lens mount. These small accessories are made for specific camera types such as Nikon or Canon. The T-ring is then attached to a T-adapter which allows you to insert the camera into the focuser of the telescope.
Once the camera is mounted in the telescope's focuser, you simply aim the filtered scope at the Sun (do NOT look through the finder scope to do this), and bring the image to a focus with the telescope focuser while watching the image on the camera screen or on a computer screen if you're using software to control the camera remotely.
To take an image, use ISO200 or ISO400 and start with a shutter speed in the range of 1/30s to 1/500s. The aperture, of course, is set by the optics of the telescope. Use a shutter release to take the image or trigger the shutter with software to prevent touching (and shaking) the camera.
Which telescope is best for solar imaging with a DSLR? It depends on your goal. Even a focal length of 1000mm to 1200mm shows the full solar disk on a DSLR sensor, so you can't get close-up views of sunspots or prominences, for example, without extending the focal length with a Barlow lens. The solar disk still fills a cropped sensor DSLR camera even at a focal length of about 1700mm and a full-frame DSLR camera at a focal length of 2500mm.
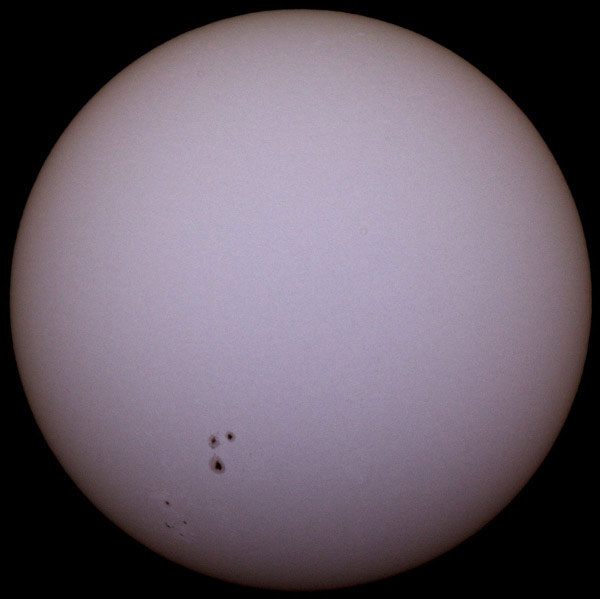
9.4 Dedicated Astronomy Cameras for Solar Imaging
Most experienced solar and planetary imagers use dedicated astronomy cameras to produce the best images. These cameras have commonly used CCD sensors, although newer cameras are now using less expensive CMOS sensors to achieve very good results. Dedicated astronomy cameras are used at the prime focus of a telescope. They have large and sensitive detectors and electronic shutters, and they can be controlled using dedicated astronomy imaging software such as Firecapture. The best results are obtained with purely monochrome astronomy cameras without a Bayer filter in front of the sensor. Color can be added to the image in post processing. Casual imagers can use one-shot color astronomy cameras for imaging the Sun with white-light filters, though these cameras do not work well in imaging with the narrow bandwidth provided by H-alpha filters.
You can grab a single image of the Sun using a dedicated astronomy camera. But the most common approach with these cameras is to shoot short video clips of the Sun, usually in AVI format, at a rate of 15fps, 30fps, or even 60fps. The clips contain hundreds or thousands of individual digital images which can be analyzed and selected for sharpness during fleeting moments of good seeing during capture. The sharpest images are processed and stacked into a single image using standard imaging software such as RegiStax or AviStack. Stacking works whether you image in white-light, H-alpha, and Ca-K wavelengths. The technique takes a little practice, but it consistently yields results that exceed what was capable with professional equipment just two decades ago.
When trying to get the sharpest solar images with a dedicated astronomy camera and image stacking techniques, it pays to choose a high-quality solar filter that produces as good an image as your telescope will allow. Most H-alpha and Ca-K filters have excellent optical quality and produce good images. To get the best images in white light, a solar wedge (or Herschel wedge) or a filter made with a premium solar film such as Baader's AstroSolar film or Thousand Oaks' Solarlite film is the best choice.
Since capturing AVI video clips of the Sun takes many seconds, you will need to use a well-aligned tracking equatorial mount for imaging. Many motorized equatorial mounts have special tracking rates for the Moon and Sun that are slightly different than the sidereal rate.
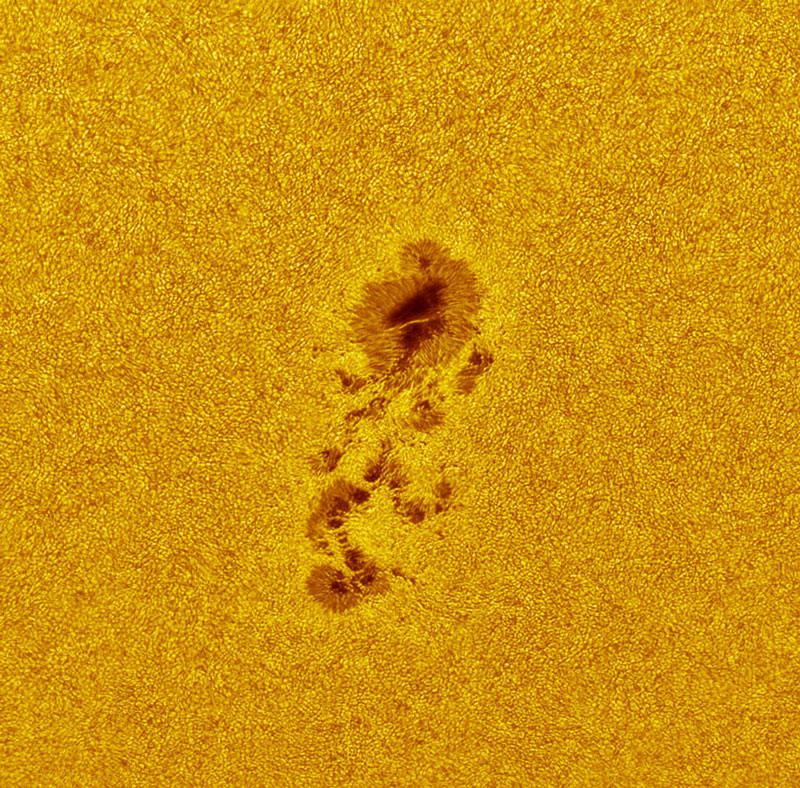
9.5 A Few Words About Processing
Once you have a digital image of the Sun, you can enhance it with further processing. While astronomical image processing is a big subject with a long learning curve, there are a few straightforward things you can do with applications such as Adobe Photoshop or Gimp.
After adjusting exposure and contrast, if necessary, you can 'stretch' the contrast of the image further by adjusting the levels of the photo. In Photoshop, for example, you can adjust the three sliders for Shadows, Midtones, and Highlights under Adjust>Levels to bring out the subtle but important elements in the image of the Sun's disk without overexposing or dimming the bright and dark areas. Adding a little sharpness can also help bring out fine detail. In Photoshop, use Filter>Sharpen>Unsharp Mask, and use a small radius of three or four pixels.
If you take your image with a monochrome camera in grayscale, you can also add color to the image. This is especially pleasing if you are imaging at H-alpha (in the red-orange part of the spectrum) or Ca-K wavelengths (in the violet). In Photoshop, you begin by converting the grayscale image to RGB color using Image>Mode>RGB Color. You can then adjust the red, green, and blue channels to achieve your desired level of colorization. For example, for H-alpha, you can drag the midpoint of the diagonal line the red channel upward, then drag the diagonal of the green and blue channel downward to produce a golden color to the image. For a grayscale Ca-K image, you can increase the red and blue midpoints and decrease the green midpoint to achieve a violet image.
As mentioned earlier, the exposure settings for capturing detail on the face of the Sun are different than the exposure settings for capturing the prominences at the edge of the Sun. Capturing prominences typically overexposes the detail on the Sun's face, while properly exposing the solar disk underexposes prominences. But if you capture one image of each, you can combine them in Adobe Photoshop so the Sun's disk and the prominences on the limb are both visible.
9.6 Imaging a Solar Eclipse
While the Sun itself often features plenty to observe and image on most clear days, a solar eclipse, when the Moon passes partly or totally across the face of the Sun, presents a wonderful opportunity to capture some dramatic images. A solar eclipse happens somewhere on Earth at least twice and as many as five times each year, but it happens over a restricted range of the Earth's surface. Many observers will travel long distances to see solar eclipses, especially dramatic total solar eclipses. Whether you plan to travel to see an eclipse yourself, or one just happens to pass your way, here are a few tips and ideas to grab a memorable image.
There are three main types of solar eclipse: total, annular, and partial. A total solar eclipse occurs when the Moon passes almost exactly between the Earth and Sun and casts a shadow in a long narrow path across the Earth. An observer within this shadow, which is called the path of totality, will see a total solar eclipse during which the Moon covers the brilliant solar photosphere and reveal the edge of the red chromosphere and white tendrils of the solar corona. A total eclipse just lasts for a few minutes, but it's a memorable event, one you can watch and image---carefully---without the use of a solar filter. Before and after the few minutes of a total eclipse, an observer in the path of totality sees a partial eclipse.
An annular solar eclipse is similar to a total eclipse, but it happens when the Moon is near its furthest point from Earth in its monthly orbit and appears slightly too small to completely cover the Sun's disk. Around the dark Moon appears a thin ring of light from the Sun's photosphere.
A partial solar eclipse occurs when the Earth, Moon, and Sun are not quite lined up and only a segment of the Moon passes across the Sun. A partial solar eclipse is also visible during the time before and after a total or annular solar eclipse, or for an observer outside of the path of totality of a total solar eclipse.
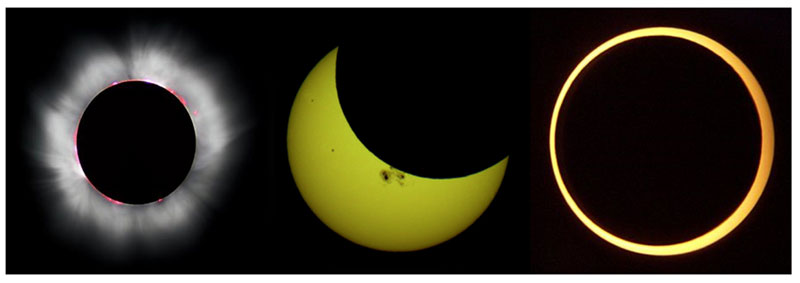
Here's an easy but VERY important rule for imaging a solar eclipse: at all times during a partial solar eclipse or annular solar eclipse, you must observe and image the Sun as if there were no eclipse at all. That is, you need to use a safe solar filter in front of your camera lens or telescope objective. Even a sliver of the Sun's brilliant photosphere is bright enough to cause blindness or damage your camera or telescope. The only time you can remove the solar filter---in fact you must remove the solar filter to get any image whatsoever---is during the few minutes of a total solar eclipse when the Sun's bright and blinding disk is covered by the Moon. When the total eclipse ends and the Sun's disk re-emerges from behind the Moon, you must replace the solar filter on your optics to prevent damage to your instruments.
As in the case for imaging the Sun generally, described earlier in this article, to image a total solar eclipse during the brief few minutes of totality, you can use a smartphone camera, a point-and-shoot, a DSLR, or a dedicated astronomy camera. You can shoot through the camera lens, afocally with a smartphone, point-and-shoot, or DSLR, or you can use a DSLR or astronomy camera at the prime focus of a telescope as described earlier.
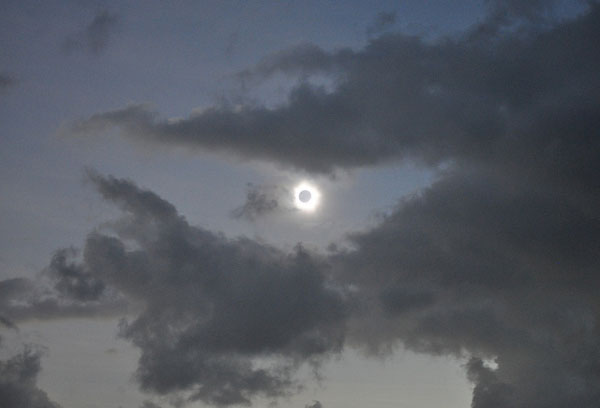
During the few minutes of a total solar eclipse, the main target of your image should be the corona surrounding the Sun, and, depending on your equipment, the surrounding landscape. During a solar eclipse, the corona is about as bright as a full Moon and the surrounding landscape is about as bright as the moments after sunset when the first stars become visible. So there's plenty of light available for the camera when you remove the solar filter. Before the eclipse, you can practice framing and shooting the full Moon and finding approximately the right settings for your camera with this level of lighting. Setting the camera to an ISO of 200-400, the aperture to f/4 or slower, and the shutter speed to a range from 1/1000s to 1/10 of a second will give reasonably good results. Faster shutter speeds will show the brightest part of the inner corona. Slower speeds will overexpose the inner corona but show the fainter tendrils of the outer corona further from the Sun.
The Sun and Moon appear just 0.5° a degree across. That's about half the width of your pinky finger held at arm's length. So to get a close up of the total eclipse you need a lens with a focal length of at least 200mm (35mm equivalent) or 135mm (for APS-C sensors). Longer is better. Focal lengths of 1000mm to 1200mm still show the full totally eclipsed Sun on a DSLR sensor and give you a close-up view of the corona. You want to keep the focal length less than 2000mm (35mm equivalent) or 1300mm (APS-C) to avoid cutting off the corona. With such long focal lengths, you will need a solid tripod to hold the camera steady.
If you don't have a zoom lens or a telescope for your camera, you can try for a wide-field view of the totally eclipsed Sun, the sky, and the surrounding people and landscape. You can also try, before and after the solar eclipse, to take a simple image of the partial eclipse through a safe solar viewing card (see below). It makes for a memorable snapshot.
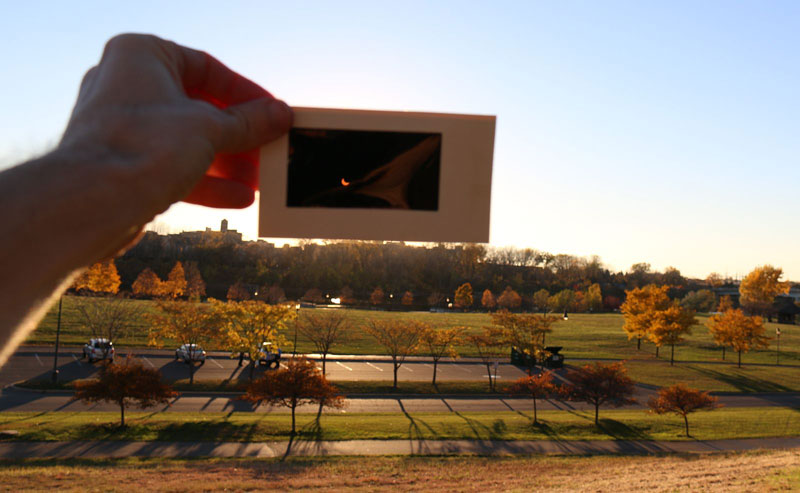
A few more tips for imaging a total solar eclipse:
- Taking an image of a solar eclipse during the partial phase involves the same consideration as imaging the Sun in general. You MUST use a solar filter over your camera lens or over the objective lens of your telescope or binoculars. If the Sun is too bright to look at with your eyes without a solar filter, it's too bright to image without a solar filter.
- As with visual observation, once the eclipse reaches totality and becomes safe enough to see with your eyes, you can---and must---remove the solar filter from your camera. Otherwise, your camera will not see anything. Once totality ends, if you wish to image the subsequent partial eclipse, you must replace the filter.
- Do not use a flash. It will not help with an image of the eclipse and it's distracting to those around you.
- Don't trust autofocus to work correctly during totality. Focus on the Sun manually through a solar filter before totality, then turn off autofocus before totality begins.
- Practice focusing and taking images during the partial phase of the eclipse before totality begins, or practice weeks in advance on the full Moon.
- Make a checklist of all the equipment you need for the eclipse, especially if you are traveling. Also make a checklist of the steps required to take an image of the eclipse, including the tips in this chapter.
- Use a tripod to get a steadier image. And use a timed or remote shutter release to avoid camera shake.
- And don't forget: when the Sun starts emerging from behind the Moon, put your filters back on your camera lens or telescope, and stop looking at the eclipse directly with your eyes without a safe solar filter.
Finally, here's a counterintuitive tip. If you've never before seen a total solar eclipse, consider skipping imaging altogether and just watch the few minutes of totality with your unaided eye. It will be one of the most spectacular events you will ever see, so you don't want to spend time fiddling with your camera during this fleeting opportunity. Most total solar eclipses are imaged by hundreds of expert photographers, and you can see their work afterward. Just enjoy the show.

About the Author
Brian Ventrudo is a writer, scientist, and astronomy educator. He received his first telescope at the age of 5 and completed his first university course in astronomy at the age of 12, eventually receiving a master's degree in the subject. He also holds a Ph.D. in engineering physics from McMaster University. During a twenty-year scientific career, he developed laser systems to detect molecules found in interstellar space and planetary atmospheres, and leveraged his expertise to create laser technology for optical communications networks. Since 2008, Brian has taught astronomy to tens of thousands of stargazers through his websites OneMinuteAstronomer.com and CosmicPursuits.com.

About the Author
Manish Panjwani has been an active amateur astronomer since before Halley's Comet last flew by our neighborhood. A former wireless communications consulting engineer and management consultant to various Fortune 500 companies, Manish started Agena AstroProducts in 2003. Since then, Agena has become one of the leading online retailers of telescopes and astronomical accessories worldwide. Besides observing from his heavily light polluted backyard in Los Angeles, Manish enjoys conducting astronomy outreach programs in local schools. Manish holds a Master's degree in Electrical Engineering from Virginia Tech and an MBA from the Kellogg School of Management at Northwestern University.